

Managing Roles and Permissions
In Noca AI, roles define what users or teams are allowed to do within environments. Roles are a foundational part of the platform’s permission system — helping you maintain control, security, and proper access boundaries.
You can assign a role to any user or team, and it will apply across the environments selected during setup.
Watch & Learn
What Are Roles?
A role is a set of permissions that determine what actions someone can perform in the system — like creating flows, editing resources, or managing connections.
Noca AI includes two system-defined roles:
- Admin – a super user role who has Full access to all features and resources
- Member – another system role (not fully configured yet)
🛑 These default roles cannot be edited or deleted, but they can be assigned freely.
Where to Manage Roles
Navigate to:
Left Drawer Menu > Collaboration > Roles

The Roles screen includes:
A breadcrumb for navigation
An “Add New” button
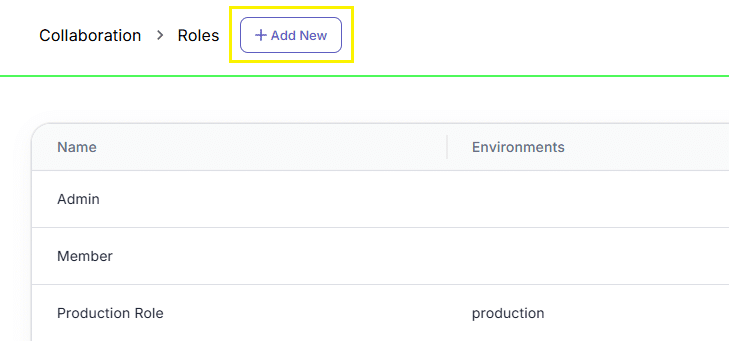
A table showing your existing roles, with the following columns:
Name
The name of the role
Environment(s)
Where the role is applicable
Actions Menu (⋮)
Options to:
- View
- Edit
- Delete
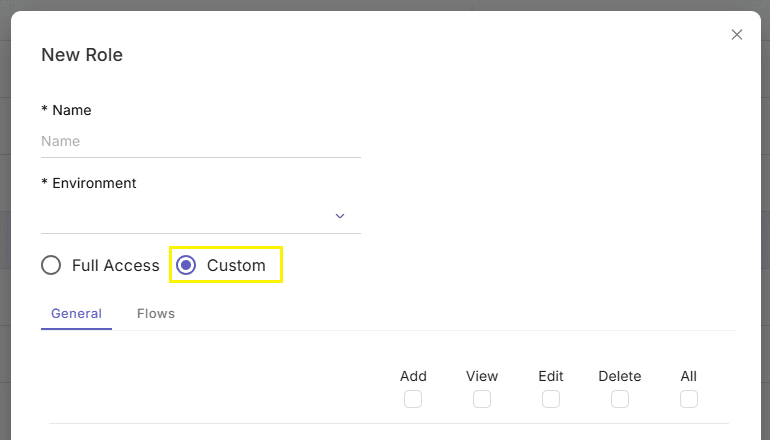
Adding a New Role
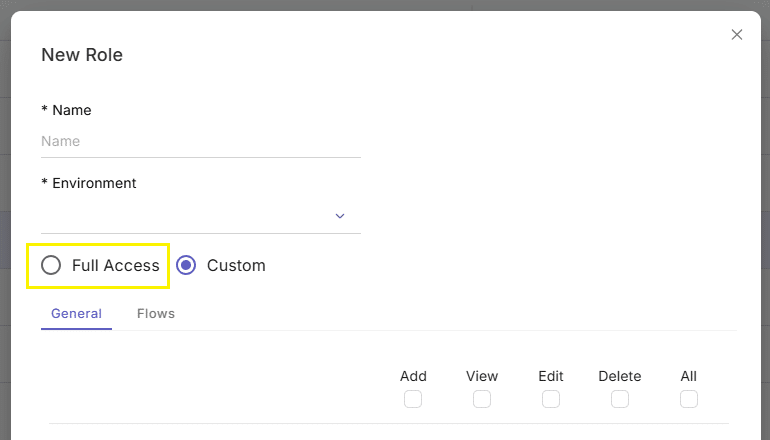
Click the “Add New” button to open the New Role modal.
You’ll be asked to define:
Role Name
Required
Environments
Multi-select dropdown for environments this role applies to (required)
Permission Type
Choose between:
- Custom (default) – Manually configure what this role can do
- Full Access – Grants unrestricted access
Custom Role Setup
When you select Custom, you’ll be presented with two tabs for defining permissions using a checkbox matrix:
Tab 1: General Permissions
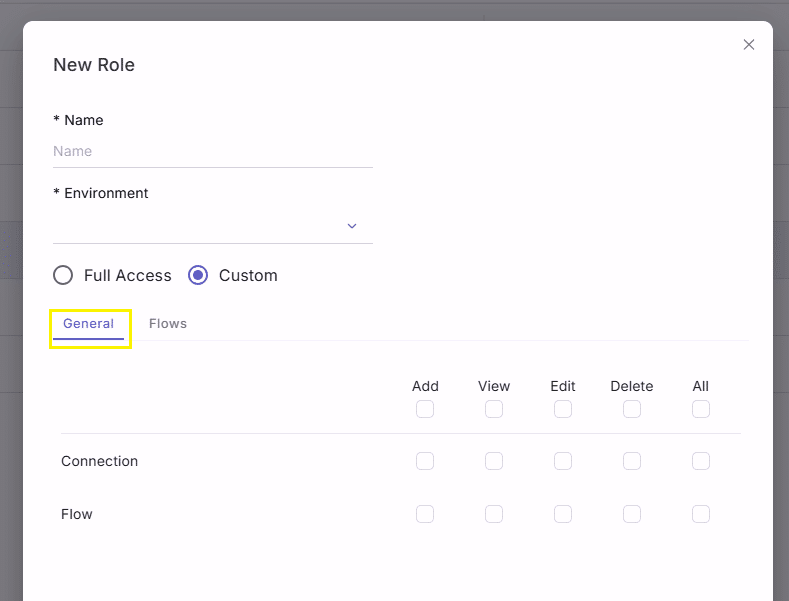
This tab allows you to configure general access for the following system-wide components:
Connections
Flows
Each row in the matrix represents one of these components.
The columns define permission types:
Add
View
Edit
Delete
All (selects all four actions)
At the top of the matrix, there is a header row with checkboxes.
Selecting a checkbox in the header will automatically enable all checkboxes in that column, making it easy to apply permissions in bulk.
Tab 2: Flow-Specific Permissions
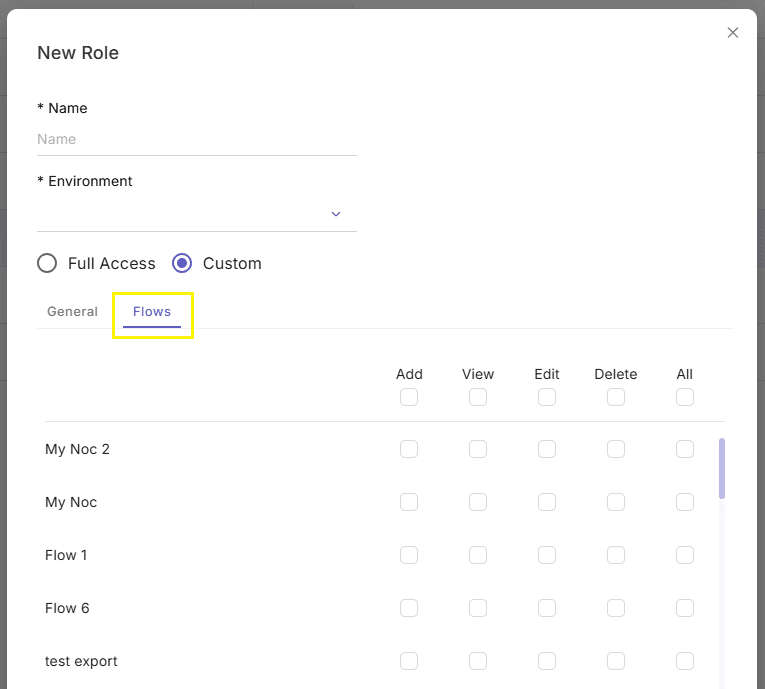
This tab allows you to assign granular permissions per individual flow.
Each row in the matrix represents a specific flow
The columns (Add, View, Edit, Delete, All) work the same as in the General tab
Just like in the General tab, the header row contains checkboxes that let you quickly apply permissions to all flows in a given column.
This is useful when you want to restrict access to certain flows while leaving others fully open.
Full Access Role
If you select Full Access, the user or team assigned this role will have unrestricted permissions across the environments you selected:
- All resources
- All connections
- All flows
This option is useful for platform administrators or power users who require complete access.