


How to Setup a Slack Connection in Noca AI
This guide walks you through how to set up a Slack connection in Noca so your workflows can send messages, alerts, and documents directly to Slack. You’ll connect your Slack workspace, authorize access, and confirm the integration is ready to use inside your Noca flows.
Watch & Learn
Where to Start:
1
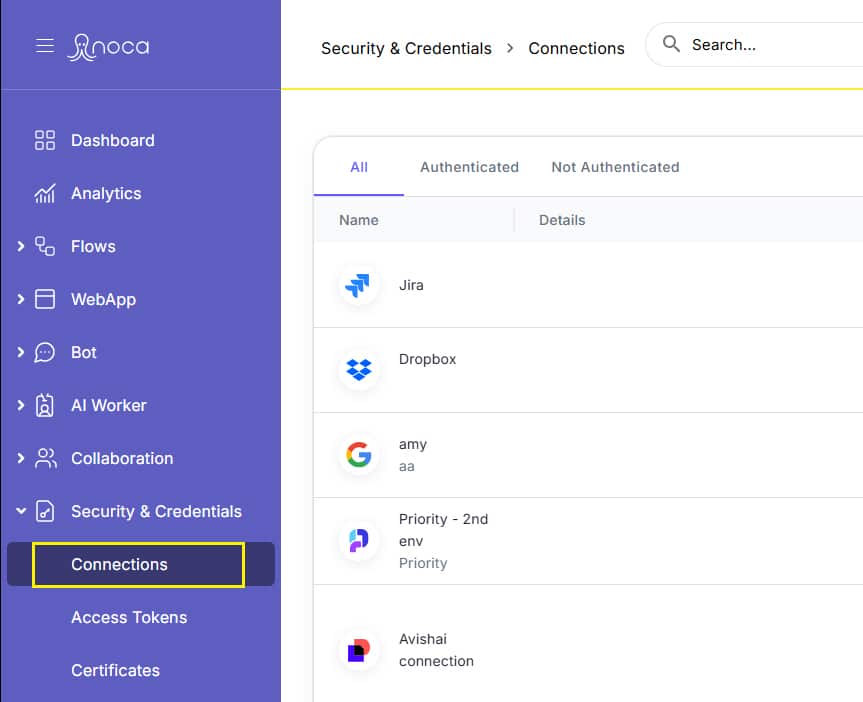
Open the left drawer menu
2
Navigate to Security & Credentials > Connections
3
Click the “Add New” button at the top of the page
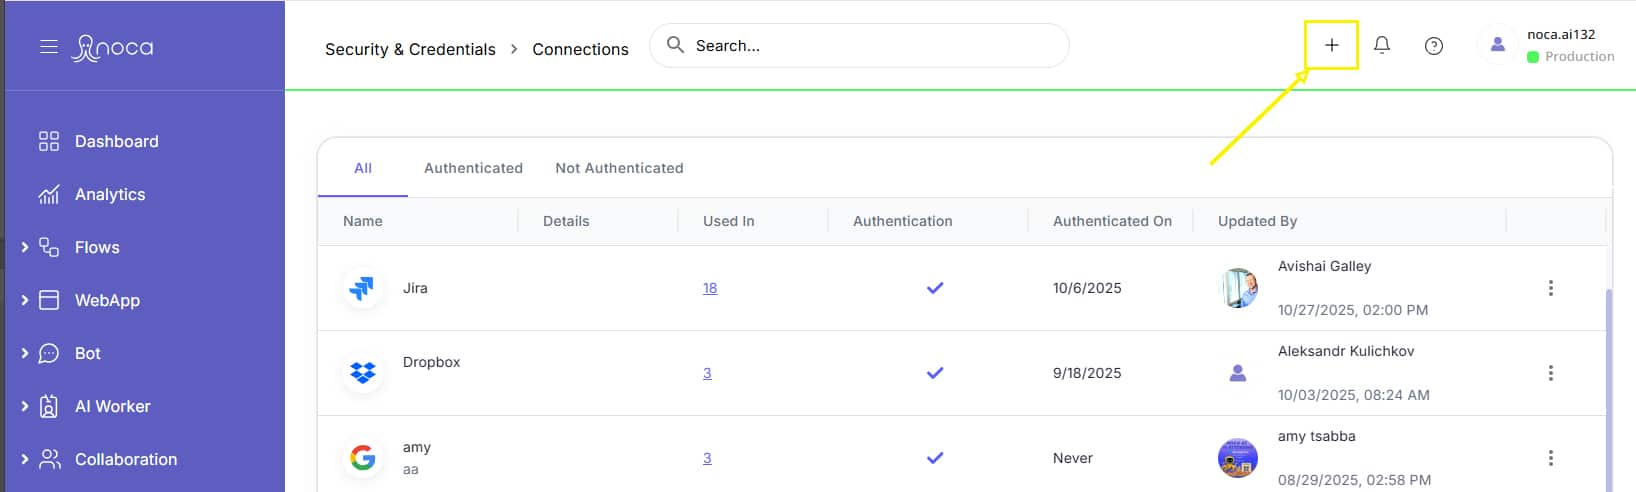
This opens a multi-step wizard to guide you through setting up your Slack connection.
Step by Step
1
Choose the App
- In the app selection screen, locate Zoom in the list of available services.
- You may find it under the Recommended tab, but if not you can use the search box to look for it, or switch to the All tab to browse all existing services.
Click on the Zoom tile and then click Next to continue.

2
Create New
- In the window choose Create New

3
Choose Your Workspace
- Choose the Slack Workspace that you would like to connect with Noca and choose Allow

4
Name, Describe, and Test your Connection
- Choose a name for your Slack Connection
- Write a Description
- Choose Test Now

5
Save and Start Using
- Save your connection and begin using it in your Noca Flows

Back to top