How to Create a New JWT Connection in Noca
JWT Connection
A JWT connection is a way to let one system prove who it is to another system using a signed token, instead of passing around usernames and passwords. It works by generating a JSON Web Token that includes trusted claims, then having the receiving service verify the token’s signature and validity before allowing access. In Noca AI, creating a JWT connection means defining how those tokens are issued, what they contain, and how they’ll be validated. Done right, it’s a clean, reusable authentication setup that keeps integrations predictable and reduces “mystery 401” errors. In the next steps, you’ll create a new connection and configure it so requests can authenticate automatically and reliably.
Watch & Learn
What you will build:
Create a new JWT connection by creating a certificate and connection to Salesforce
Follow these steps to add and configure it:
Steps:
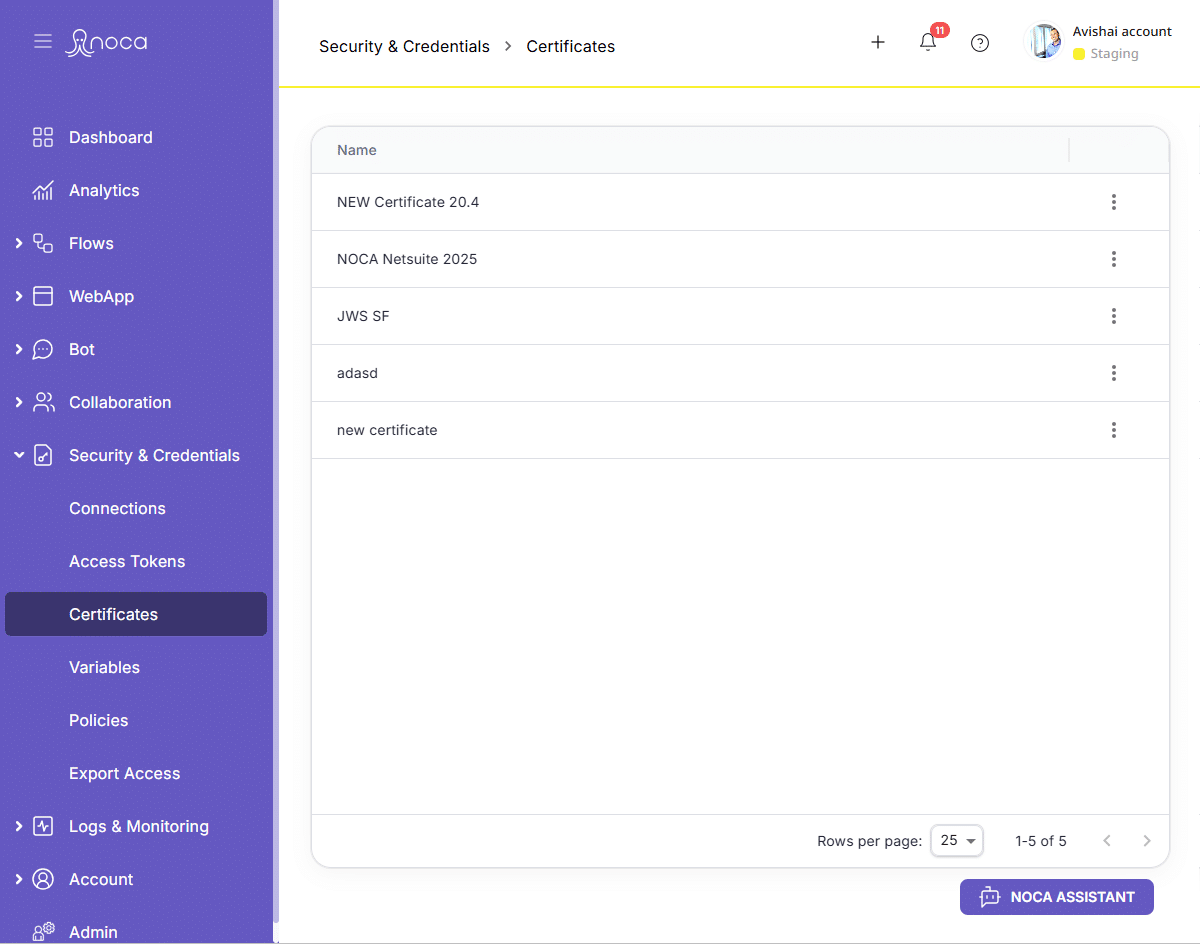
Create a new certificate
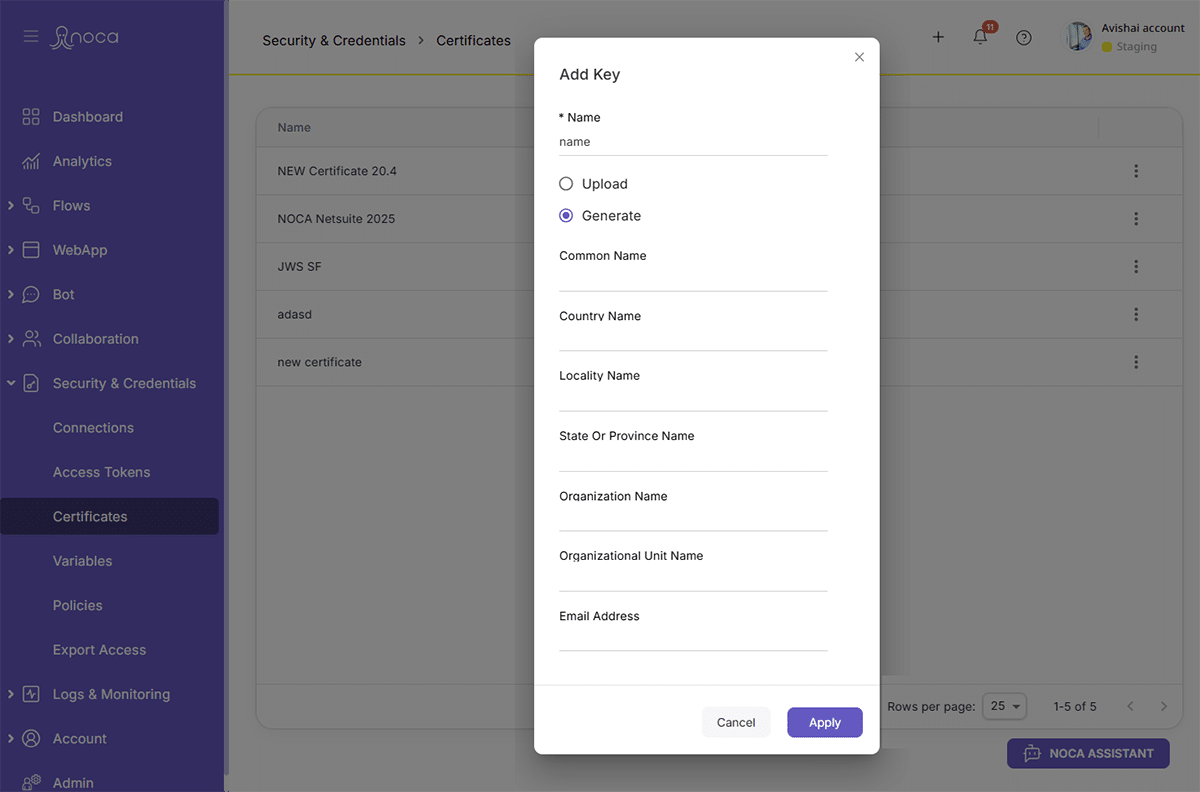
Generate a new certificate
Create a CERT File from the certificate
- Create a new .txt file
- Change the file name to end with .CERT
- Ensure that the file type was changed and not just the file name
- Save the Private Key on hand for the subsequent steps in the setup
- Ensure that the file is saved now because after choosing close it will not be viewable again
Create a New Connection
- Navigate to Security & Credentials > Connections
- Then click on the plus sign at the top of your screen as shown below
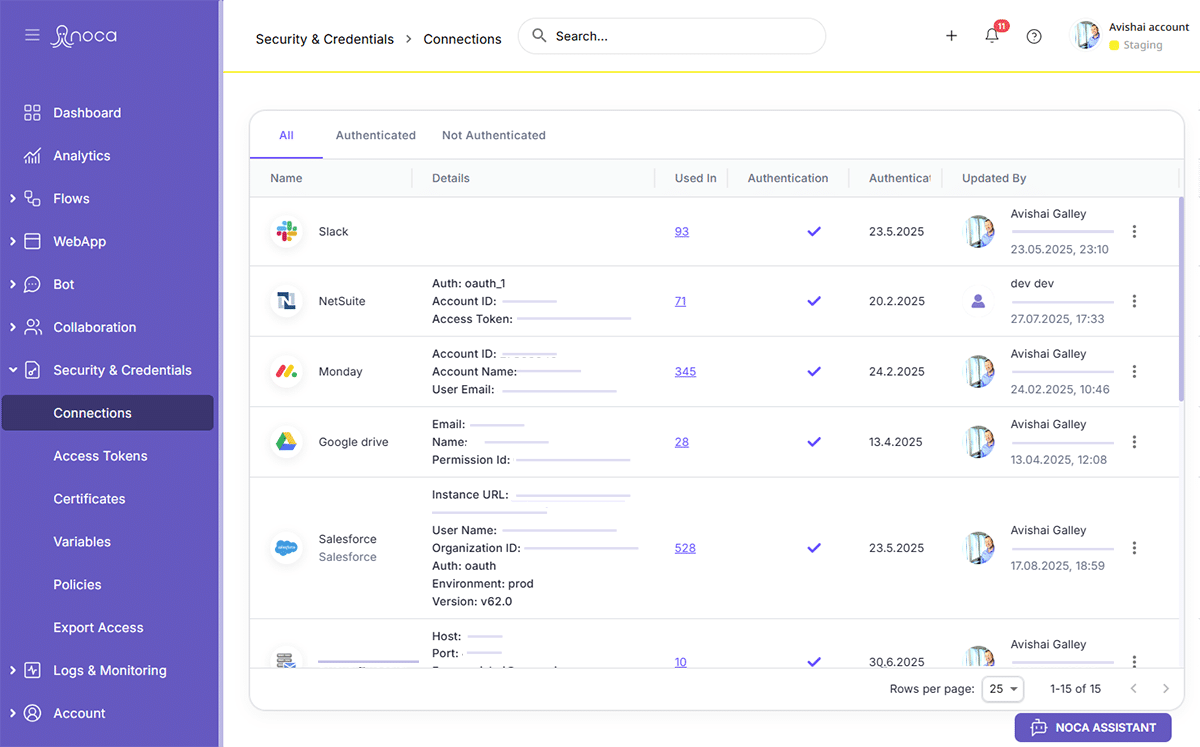
- Now choose Salesforce
Choose Create New
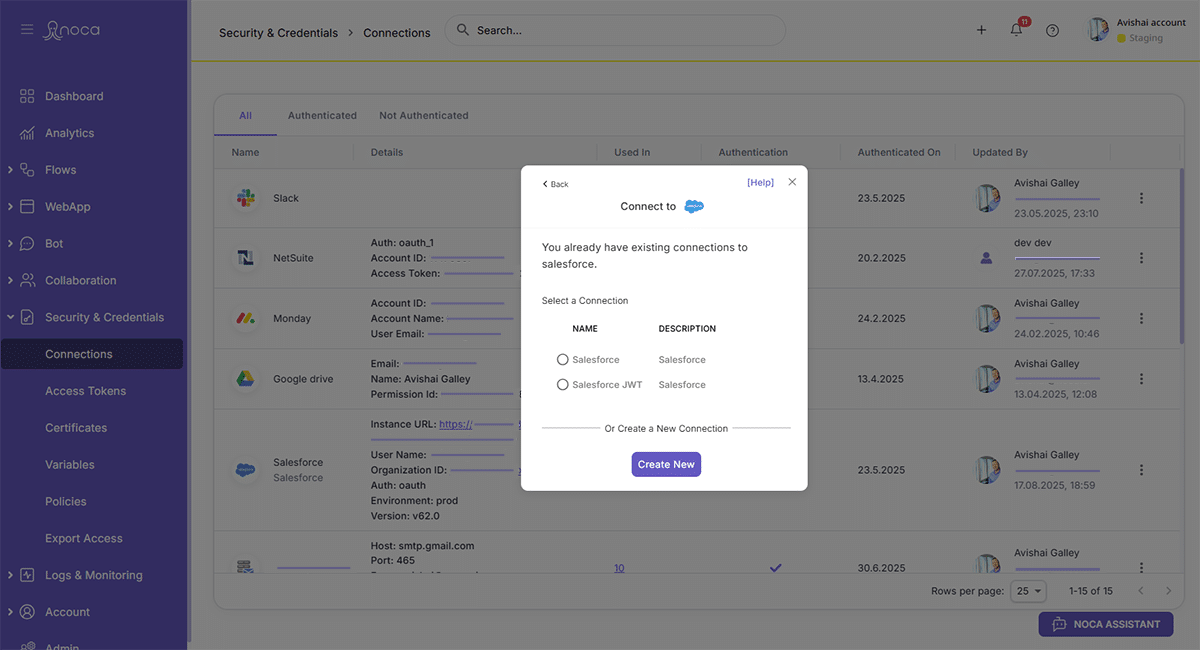
Choose JWT
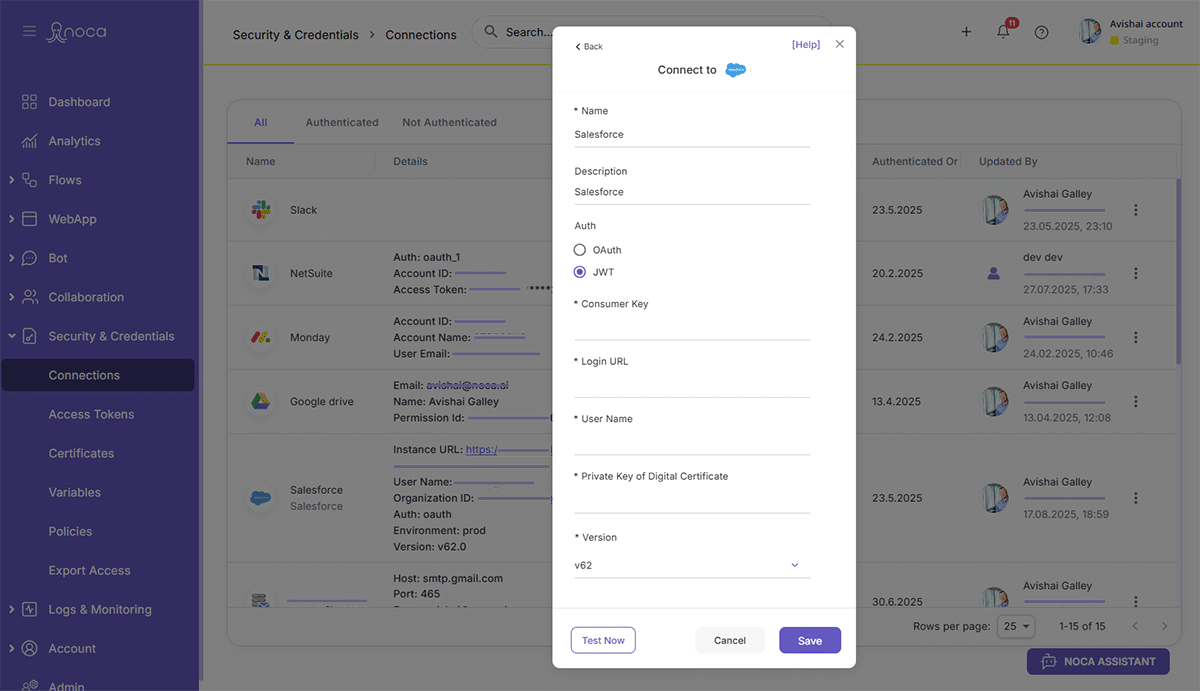
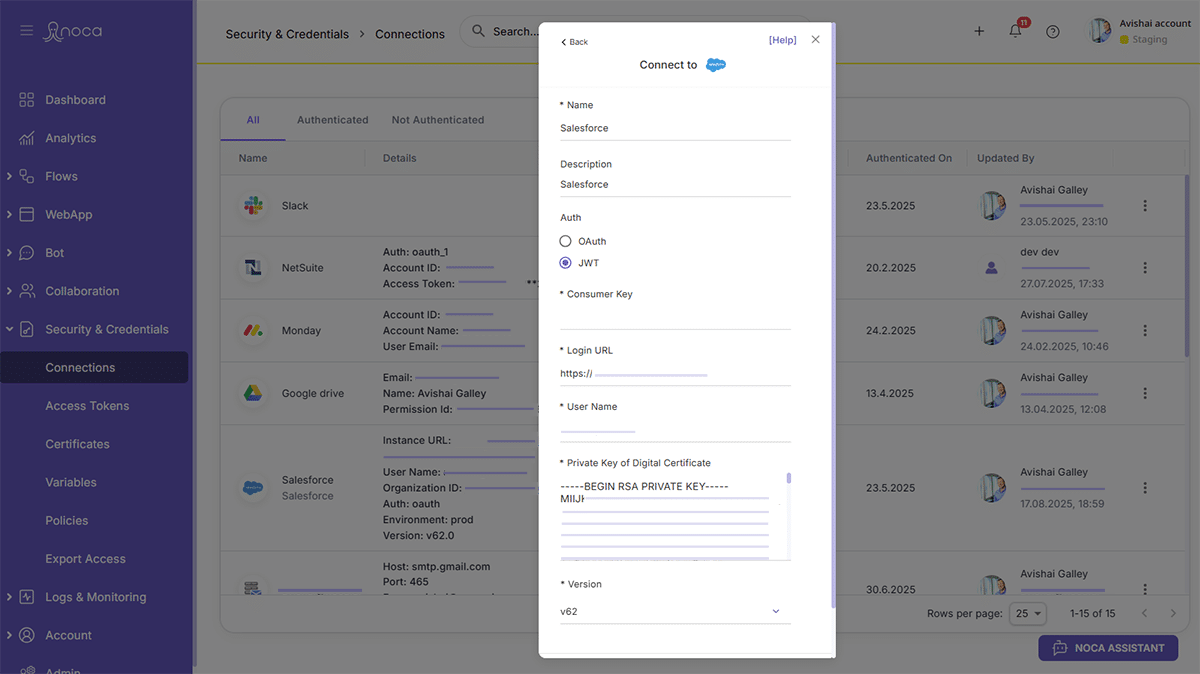
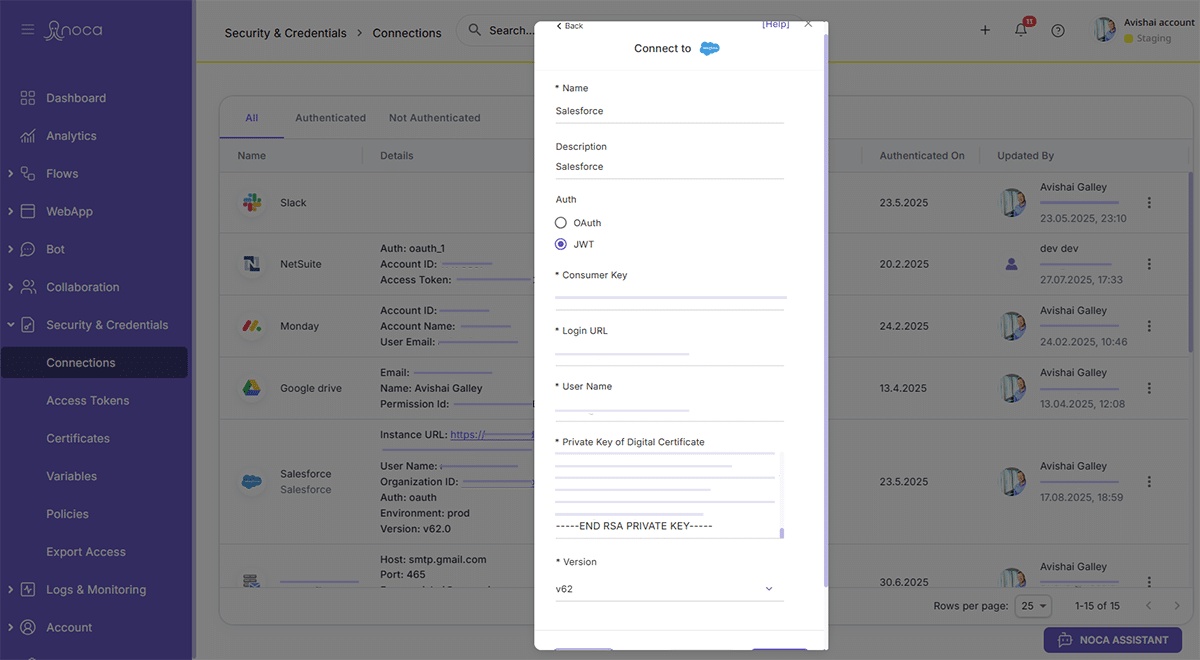
Enter Private Key from Certificate, Username, and Login URL
- Ensure that the beginning and end of the text from the certificate is included
- Use standard Salesforce login URL even in case of custom URL
- Production- https://login.salesforce.com/
- Sandbox- https://test.salesforce.com/
- Verify that Noca managed package 1.5 or higher is installed in your Salesforce org
- Here is the link to the managed package: Noca Managed Package
Login to Salesforce Setup
- Search for Settings > Apps > External Client Apps > Settings
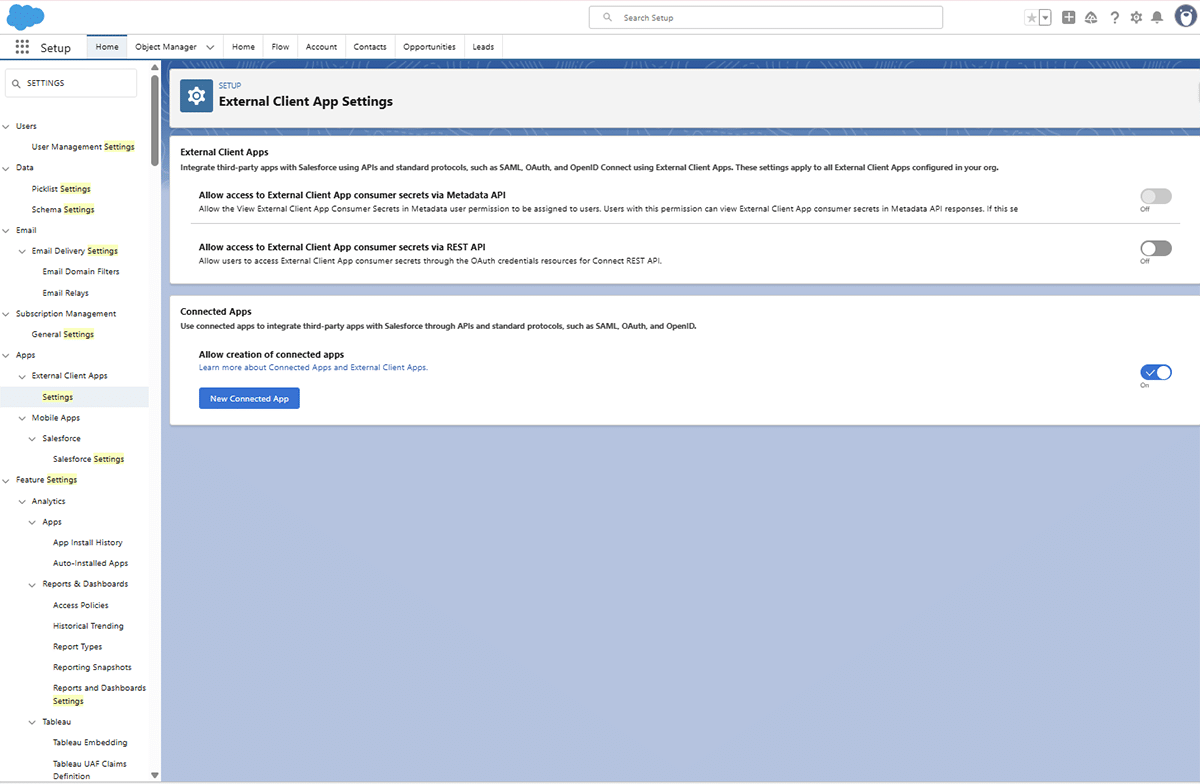
Choose New External Client App
- In the External Client App Manager choose New External Client App
- Ensure that the toggle is switched to On
Configure the New Connected App
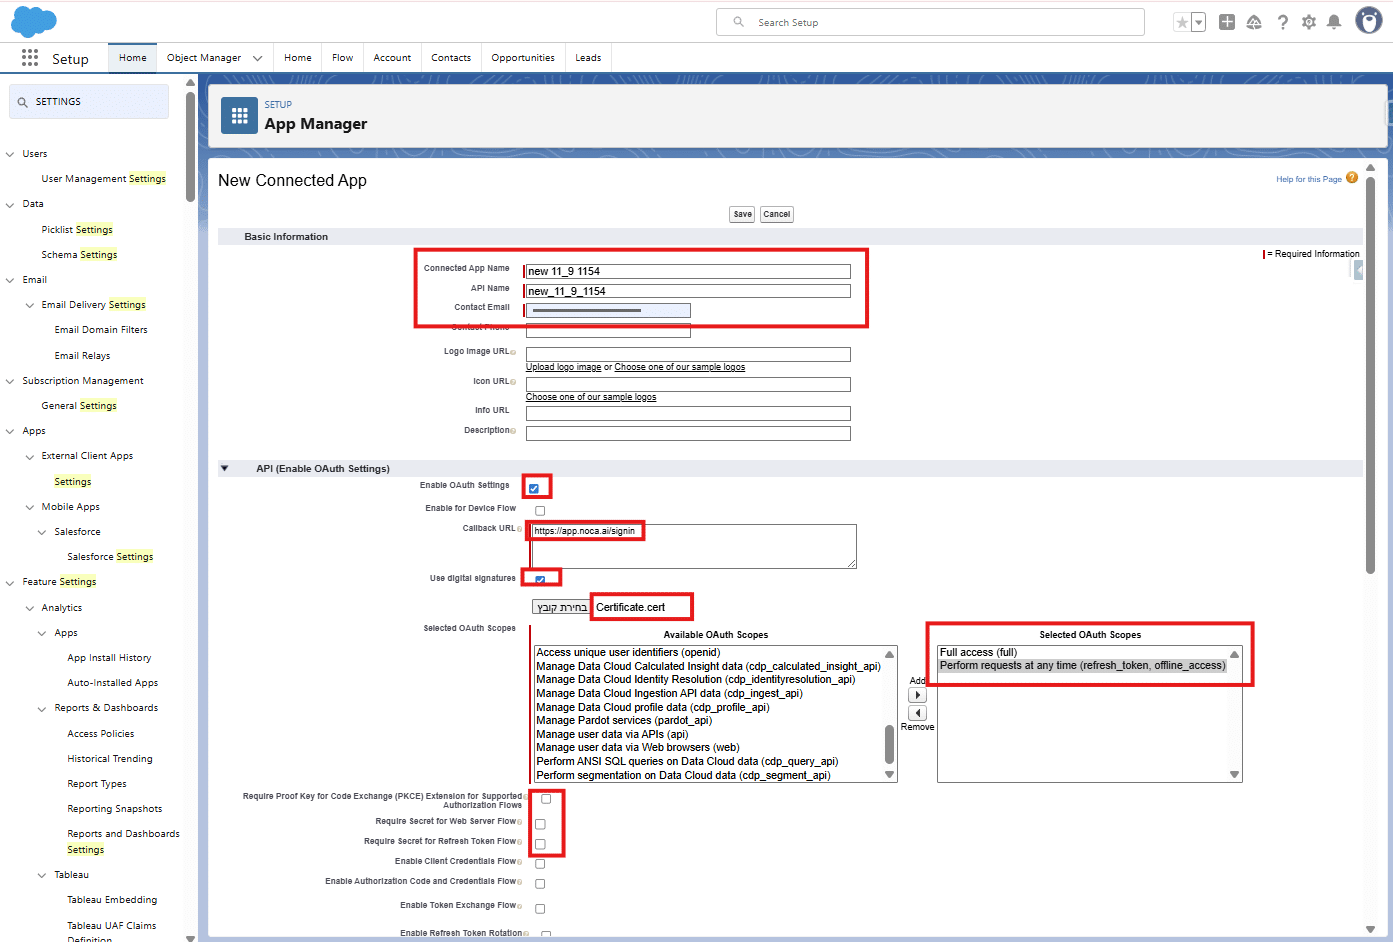
- Fill out the mandatory fields
- In the API section check the box for Enable OAuth and the use https://app.noca.ai/ in the callback URL
- Check the box for Use Digital Signature and Upload the Certificate created in step 3
- In OAuth Scopes choose
- Manage User data via APIs (api)
- Full Access (full)
- Perform requests at any time (refresh_token, offline_access)
- Access unique user identifies (openid)
- Ensure the following three check boxes are unchecked:
- Require secret for Web Server Flow
- Require secret for Refresh Token Flow
- Require Proof Key for Code Exchange (PKCE) extension for Supported Authorization Flows
- Click Save
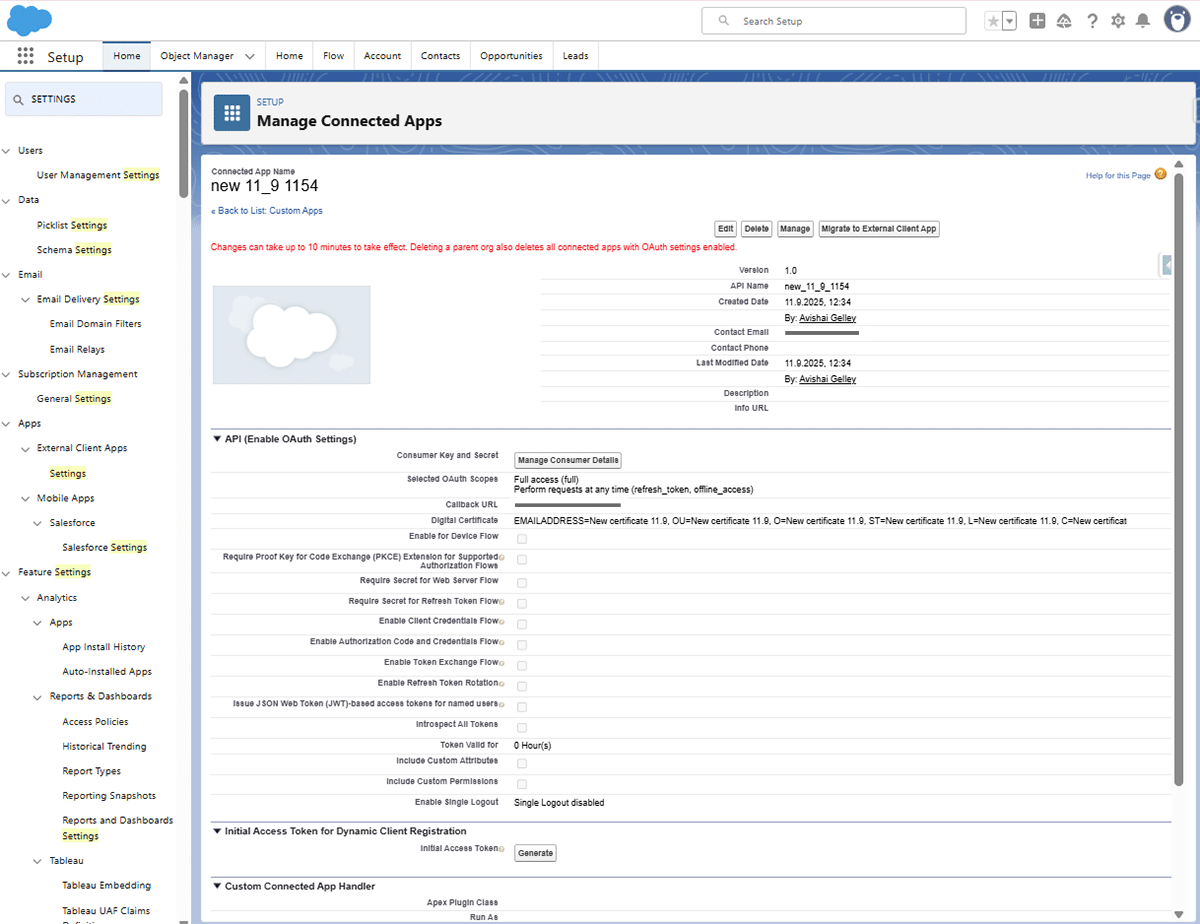
Choose Manage Customer Details and Copy the Consumer Key
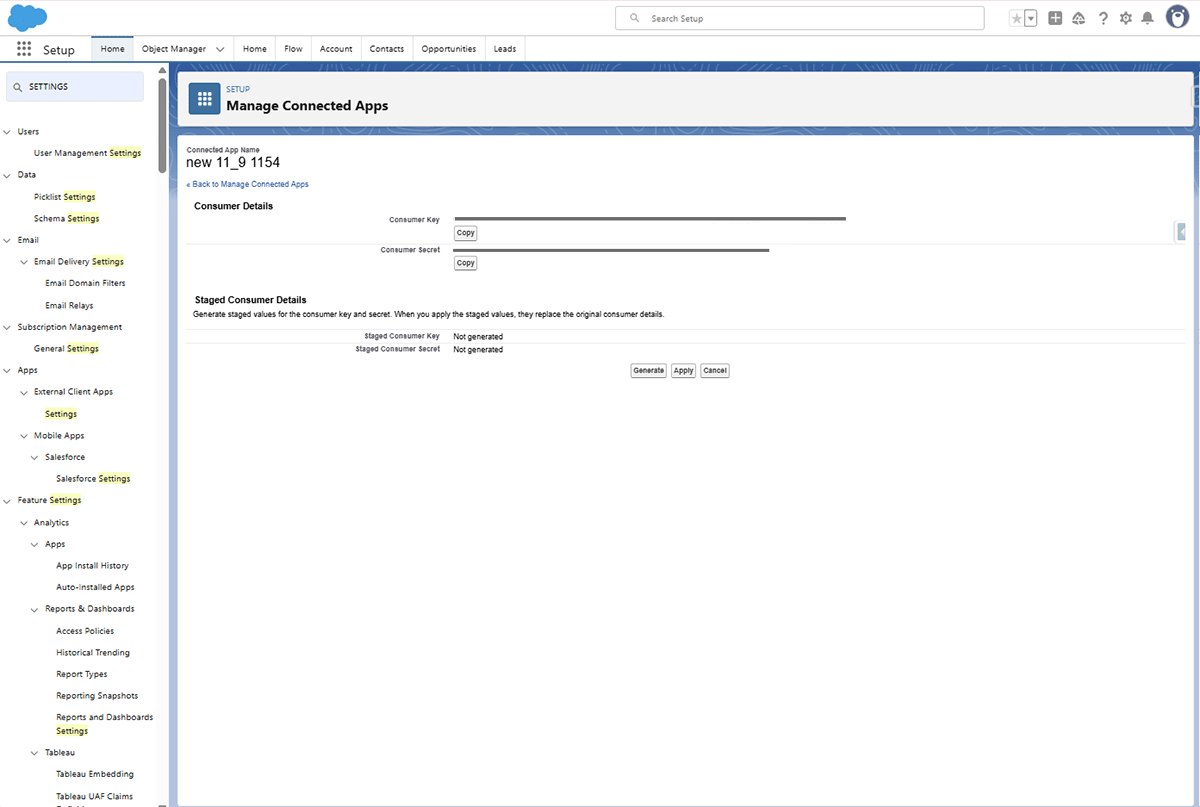
Insert the consumer key in the JWT connection in Noca
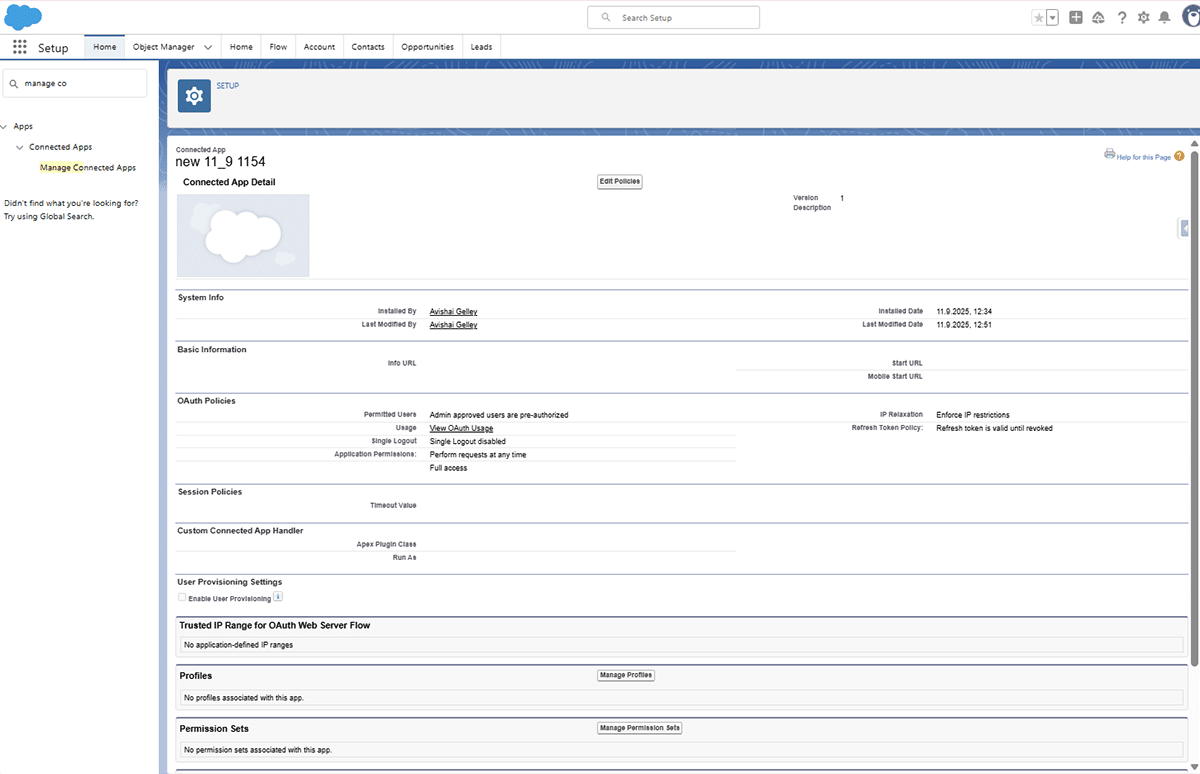
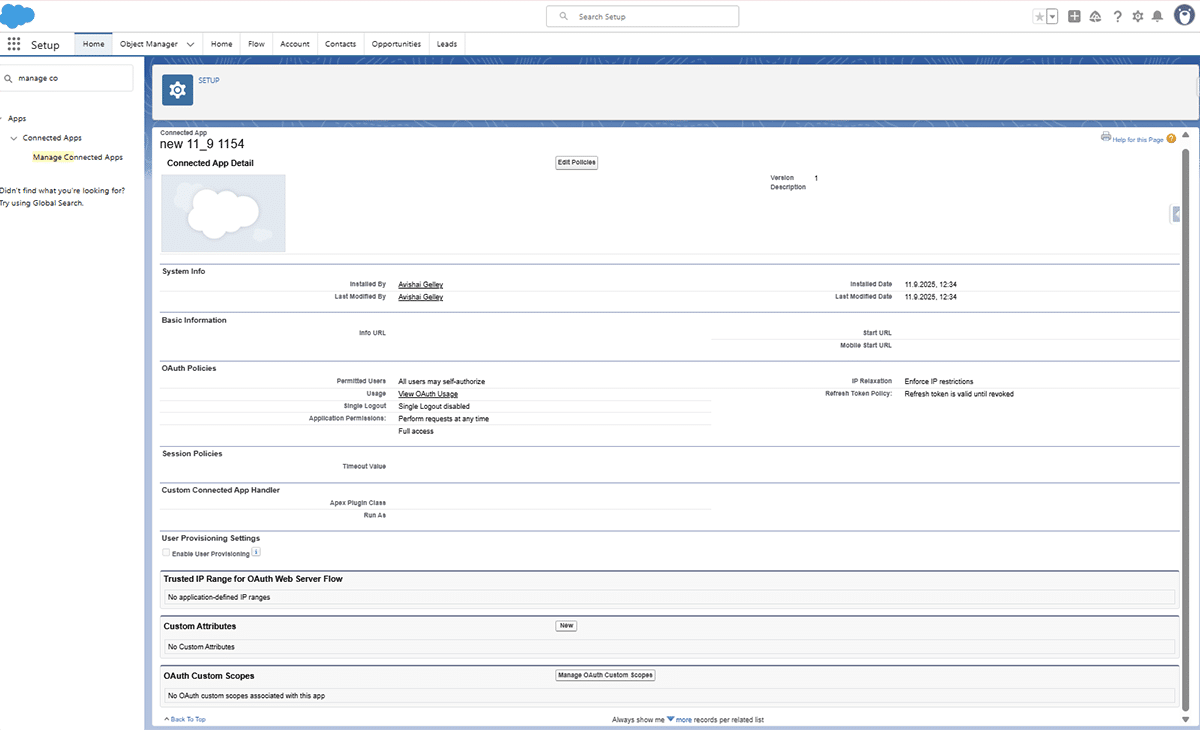
In Salesforce navigate to Manage Connected Apps
Choose Edit Policies
Choose Admin Approved Users are pre-authorized in Permitted Users
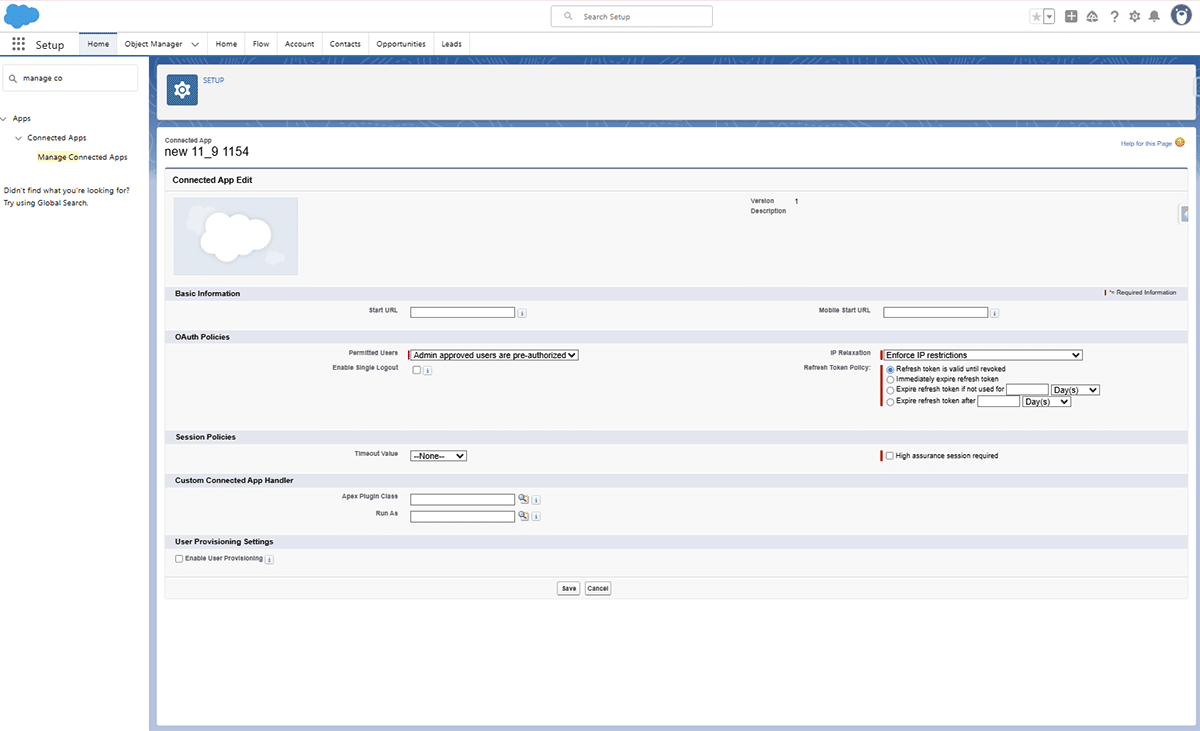
Choose Manage Profiles