Setting Up a Salesforce Connection
To automate processes and sync data with Salesforce, you first need to set up a secure connection between Noca AI and your Salesforce account. This is done through the Connections screen using a guided, step-by-step wizard.
Watch & Learn
Where to Start
Open the left drawer menu
Navigate to Flows > Connections
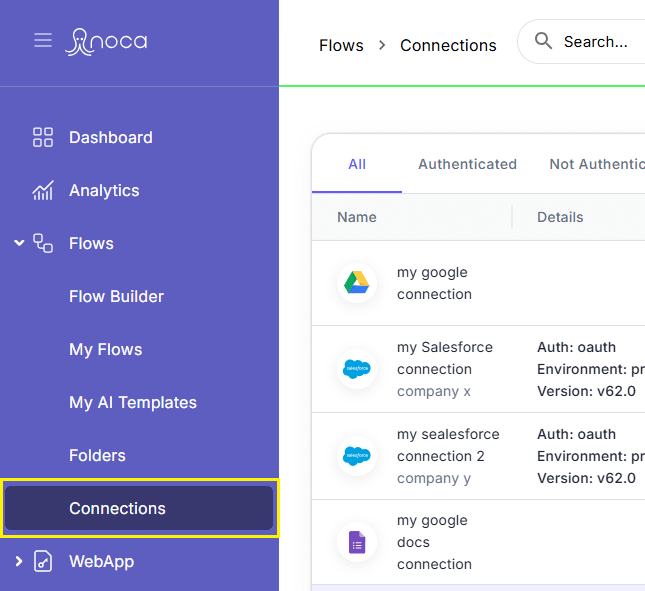
Click the “Add New” button at the top of the page
This opens a multi-step wizard to guide you through setting up your Salesforce connection.

Step by Step
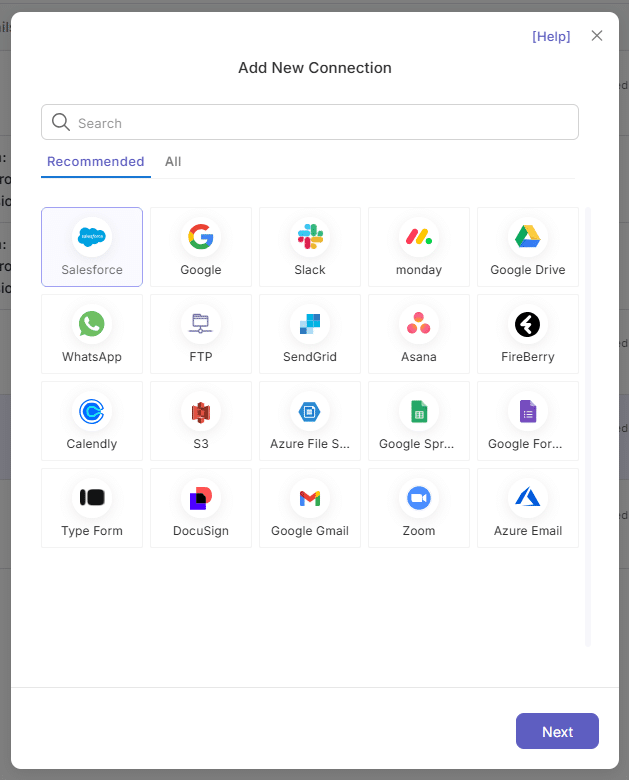
Choose the App
- In the app selection screen, locate Salesforce in the list of available services.
- You may find it under the Recommended tab, but if not you can use the search box to look for it, or switch to the All tab to browse all existing services.
- Click on the Salesforce tile to continue.

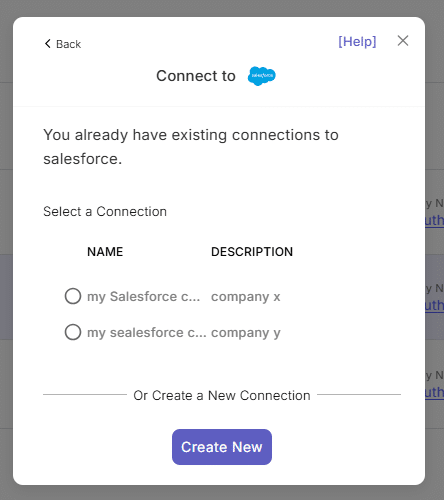
- You can review and edit existing connections if needed.
- To proceed with a new setup, click the “Create New” button.

Connection Details
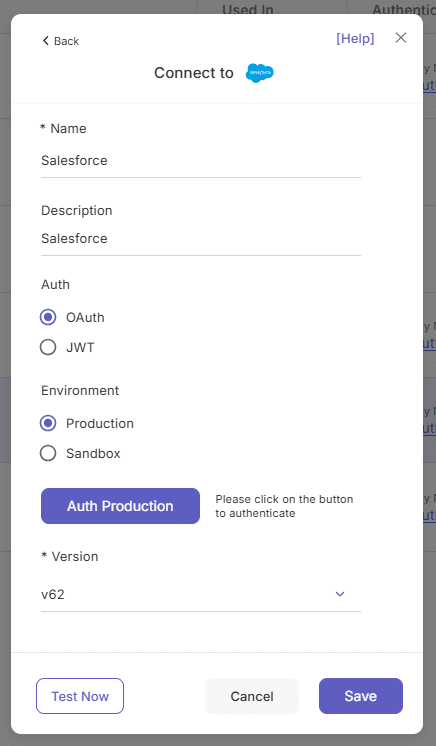
In this step, you’ll define and configure your new connection as well as authenticate:
- Connection Name – Choose a clear, descriptive name to easily identify the purpose of this connection.
- Description – Add a short explanation or internal note for future reference.
- Auth Method – Select the appropriate method (e.g., OAuth, JWT).
- Environment – Choose the environment this connection will be used in (e.g., Production, Sandbox).
- Auth Button – click to authenticate
- Salesforce Version – Select the Salesforce API version you’d like to use.
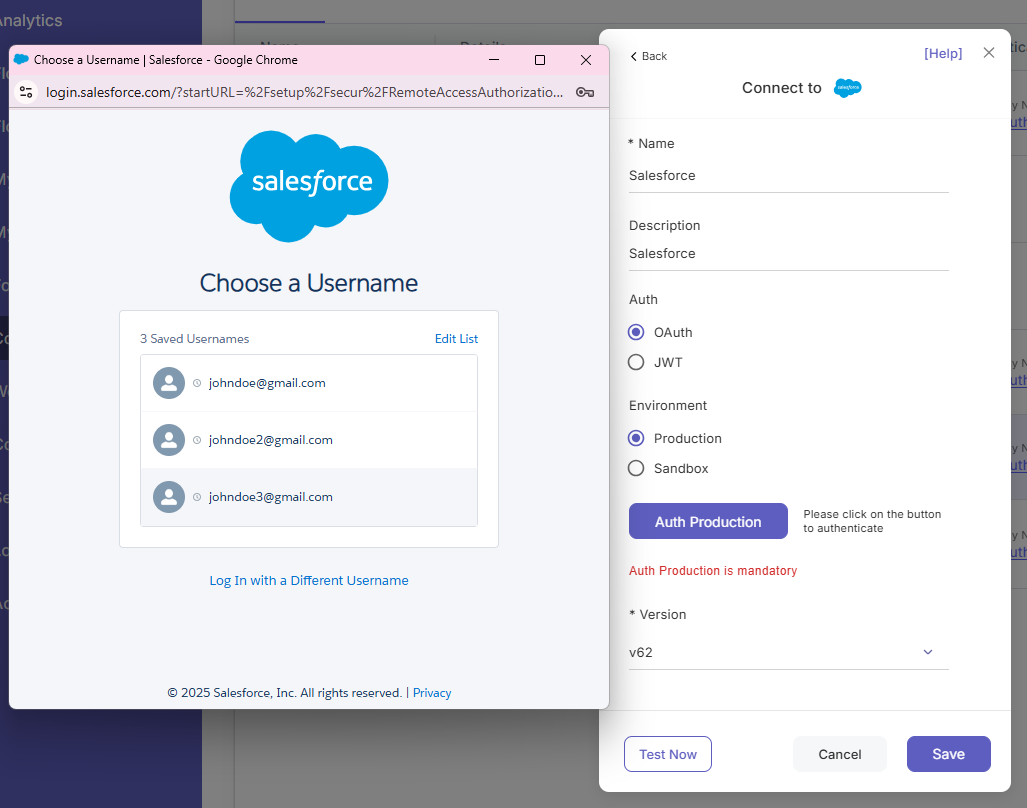
Authenticate
Click the “Auth Production” button to begin the authentication process.
- A Salesforce login screen will appear.
- Sign in using the Salesforce credentials associated with the account you wish to connect.
- Upon successful authentication, you’ll return to the Noca wizard.

Test and Save
Once authenticated, you’ll see confirmation that the connection was established.
At the bottom of the screen, you’ll find three options:

- Test Now– (Recommended) Run a quick test to ensure the connection is valid and responsive.
- Cancel – Exit the wizard without saving.
- Save – Finalize the setup.
After saving, the new Salesforce connection will appear in your main Connections table, ready to be used in your flows.
Wizard Header Options (Always Available)
At the top of the modal throughout the wizard, you’ll find:
Back
Navigate to the previous step
Help
Opens a relevant Help Center article for the current step
X (Close)
Exit the setup process