
Managing Certificates in Noca AI
Some applications and services require a certificate-based authentication method to ensure that only trusted systems can connect to them. In Noca AI, certificates provide a secure way to integrate with those systems — acting as digital credentials that verify the identity of your environment. For example: Connecting to NetSuite via OAuth 2.0 requires a valid certificate.
Certificates in Noca AI are created per environment and stored securely in the platform, ready to be referenced when setting up integrations.
Watch & Learn
Where to Manage Certificates
Navigate to:
Left Drawer Menu > Security & Credentials > Certificates

Screen Structure
The screen includes:
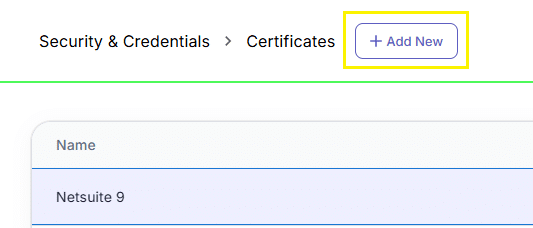
- A breadcrumb for navigation
- An “Add New” button

- A table listing your existing certificates
Certificate Name
The name you assigned to the certificate
Actions Menu (⋮)
Options to:
- View Key Details
- Delete
Creating a New Certificate
Click the “Add New” button to open the certificate creation modal.
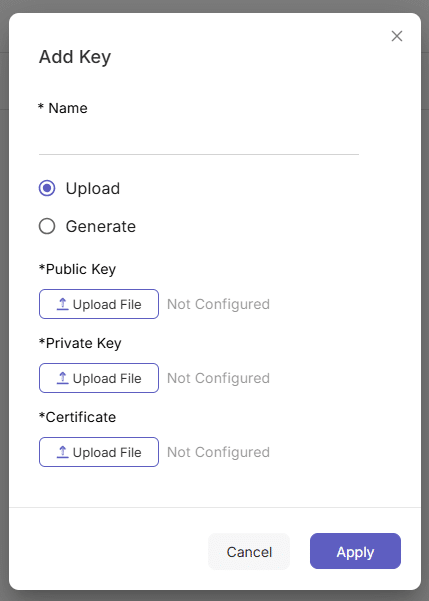
You’ll first enter a Certificate Name (required), then choose one of two options:
Option 1: Upload an Existing Certificate
You’ll be asked to upload the following three files:
- Public Key
- Private Key
- Certificate File
After uploading, click Apply to create the certificate.
Option 2: Generate a New Certificate
You’ll be asked to fill in the following fields:
- Common Name
- Country Name
- Locality Name
- State or Province Name
- Organization Name
- Organizational Unit Name
- Email Address
Once submitted, Noca AI will generate the certificate internally.
Click Apply to finish the process.
📁 The generated certificate can then be used in third-party services that require it (like NetSuite OAuth 2.0 setup).