

Condition Node
Defining Conditional Paths in Your Flow
The Condition node enables you to branch your flow into multiple routes based on logical rules. When a rule evaluates to true, the flow continues along its associated path; if false, it follows the Else route. With the Condition node, you can craft sophisticated decision logic in your flows—ensuring each path executes only under the criteria you define.
On the canvas, the Condition node appears more complex than other nodes: it uses a rhombus shape with an attached rule stack to its right. You can define the high-level structure directly on canvas—add rules and connect their outcomes by adding nodes after each rule. However, the rule details are configured in the Properties panel. Click on a rule’s name to open the panel and focus on its container, where you set each rule segment.
Node Appearance on Canvas
On the canvas, the Condition node appears more complex than other nodes: it uses a rhombus shape with an attached rule stack on its right. You can define the high-level structure directly on the canvas—add rules and connect their outcomes. However, the specifics of each rule are configured only in the Properties panel.

Rule Stack Structure on Canvas
The rule stack gives an overview of your branching logic:
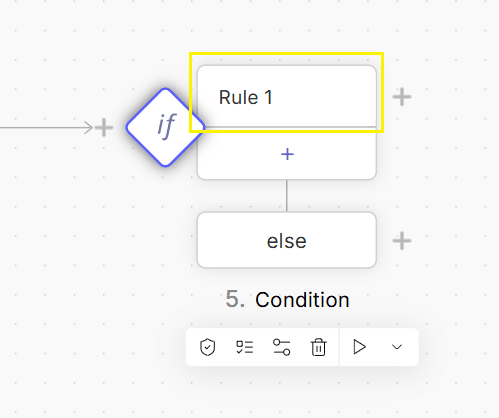
Rule row:
Displays the rule name.
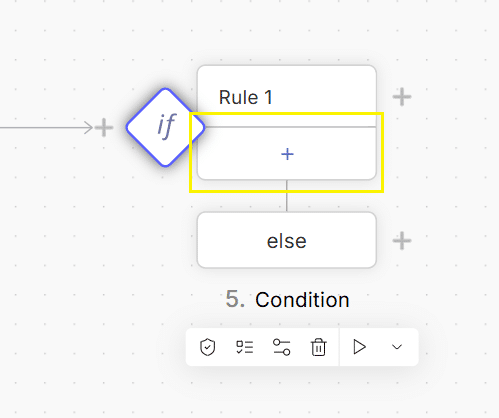
Add rule (+):
Click to insert a new rule into the stack.
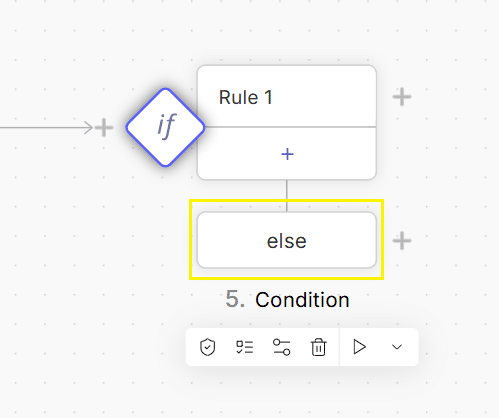
Else:
Defines the path taken when all rules evaluate to false.
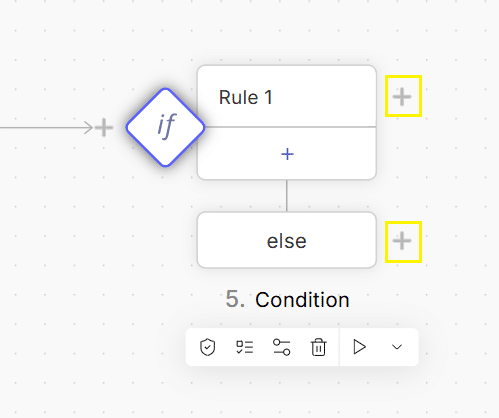
Outcome (+) icons:
Hover over a rule row or Else to reveal a + icon, which opens the Add Node modal to choose the next node for that branch.
This stack allows you to define the general structure, add rules, and set outcomes. To configure a rule’s details, select its row to open the Properties panel.
Configuring Rule Details in the Properties Panel
When you click on a rule row, the Properties panel opens focusing on that rule container:
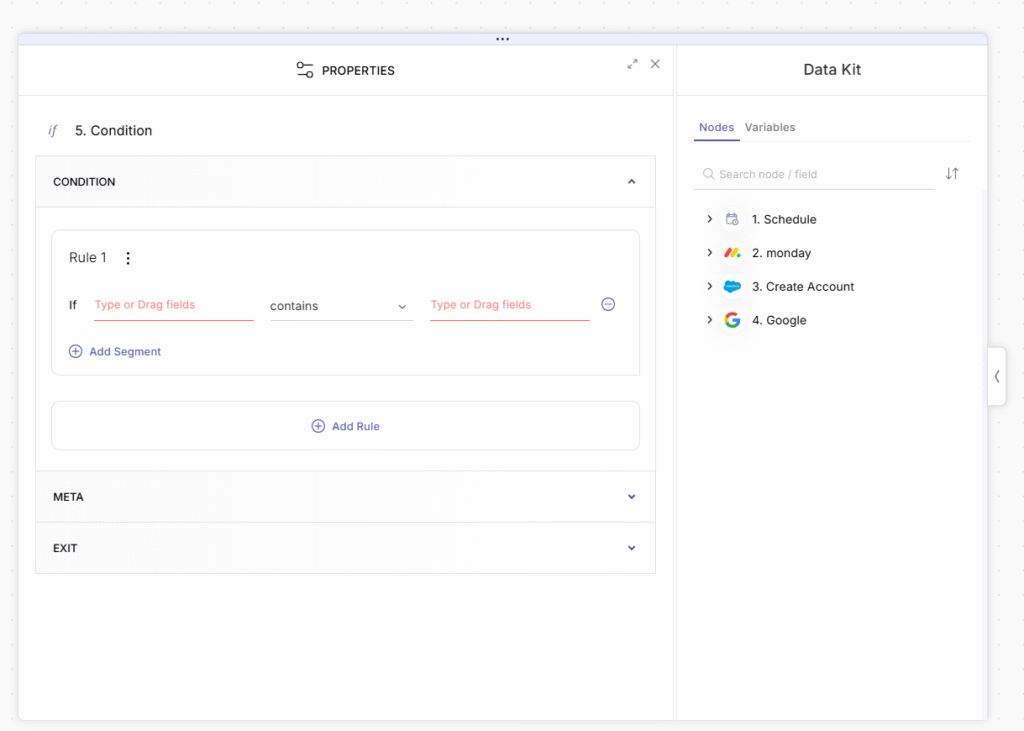
- Rule Name: Default “Rule 1,” etc. Double-click to rename inline or use the kebab menu to Rename, Remove, or Disable the rule.
- kebab menu next to the rule name
containing actions for: Rename, Remove, or Disable the rule. - Condition Line: Define the logical statement:
- Left Operand: Drag a dynamic field or type a literal value.
- Operator: Choose from operators (equals, contains, greater than, etc.).
- Right Operand: Type a value or drag a dynamic field.
- Remove Segment (–): Delete any individual clause within the condition.
- Add Segment: Click to append an AND/OR clause, enabling compound expressions (e.g.,
Name equals Ben OR Age < 18). - Add rule: Below the rule containers to append new rule containers for additional branches.
* Note: The Else branch has no configuration input—its + icon on canvas determines its outcome.
Example of adding a condition – step by step
Add Condition Node to your flow
Click on the default “Rule 1” row on canvas
This will open the rule in the properties panel.
Rename the Rule to “Adult Check”, double-clicking its name or via kebab menu
Configure the condition:
Left Operand: drag an Age field into this input from the Data Kit > Salesforce > Contact
Operator: choose “Greater than”.
Right Operand: Enter”18″.
Set True Path:
Select the node / Hover over it to reveal + icon next to the “Adult Check” row on canvas . Then click it, and choose a Google Calendar node to create an appointment.
Set Else Path:
Select the node / Hover over it to reveal + icon next to the “Else” row on canvas . click +, and add a Slack node sending a “Not an adult” message.
Tips & Best Practices
Name Rules Clearly
Use descriptive names like “HighValueOrder” for clarity.
Keep Conditions Readable
Break complex logic into multiple rules rather than one oversized condition.
Use AND/OR Wisely
Group related checks with AND, separate alternative scenarios with OR.
Disable vs. Remove:
Use Disable Rule to temporarily skip a branch without losing its configuration.