Collaborating on a Flow
Overview
Some automation projects can be vast and complex—combining advanced logic and multiple services with different configurations. In such cases, collaboration is essential. Whether you’re working with system integrators, developers, or business users, each team member often brings specific expertise to different parts of the project.
To support this need, Noca AI enables you to invite users and teams to your account (even per environment), allowing you to co-work on projects and flows seamlessly—without stepping on each other’s work.
How Can I Let Someone Work on My Flow?
It’s easy. Simply add individual users or teams to your environment, and assign them roles that define what they can or cannot do. These roles control their access to projects, flows, and even specific nodes.
Step-by-Step: Granting Permissions
1. Create a Role (Permission Set)
Roles determine what actions a user or team can perform.
While you start with two built-in system roles (Admin and Member), most collaborative projects benefit from more tailored roles.
To create a new role:
Please note that Role permissions may be set in two levels:
Project-Level Permissions
This option allows you to set permissions for general operations revolving connections and flows as well as for specific projects (flows, apps).
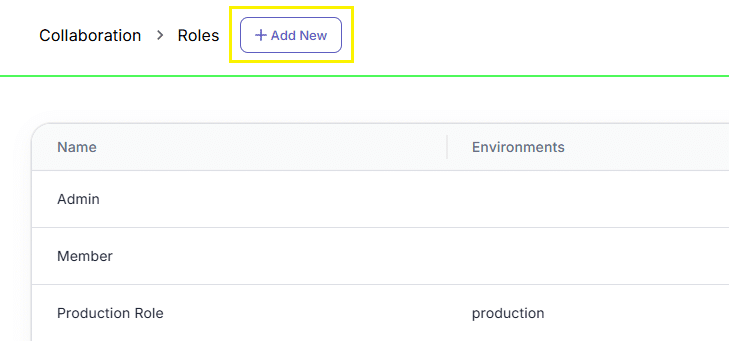
How to add a Role:
Go to Roles Page:
(Left Drawer Menu → Collaborations → Roles).
Click “Add New”
Enter a name for the role
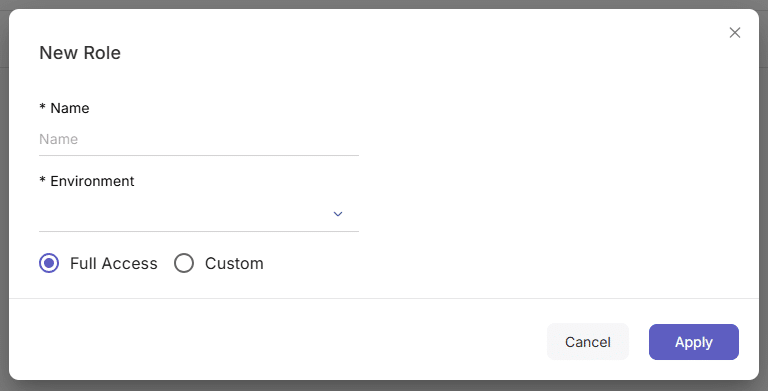
Specify the environment where this role will apply
Choose either:
- Full Access (to all projects and actions), or
- Custom Access with two tabs:
- General: Manage connections and flows (add, edit, delete etc.)
- Flows: Configure granular flow permissions
👉 Read more about how to define and manage roles
Node-Level Permissions
This option allows you to set permissions for specific nodes within a flow in the flow builder.
How to add a permissions to specific nodes:
Select a node on the canvas
Click the “Permissions” icon from the quick toolbar under the node
The permission roles modal will open
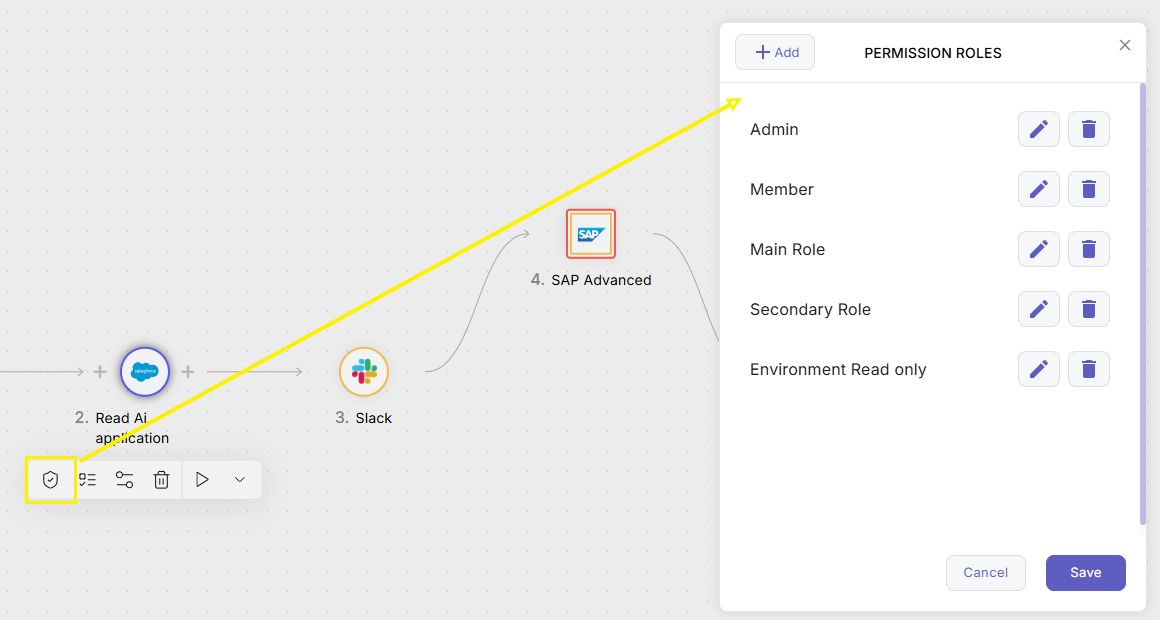
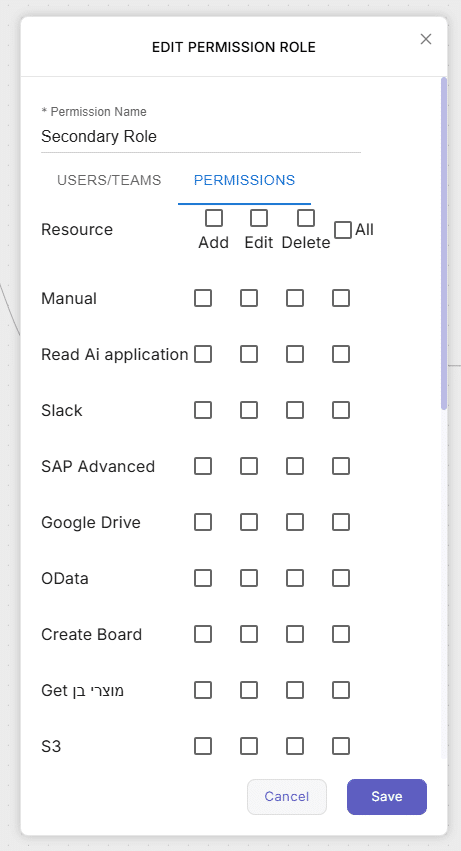
In the modal: Choose the role and Click the “Edit” icon
You will get a list of the nodes in this flow and you will be able to specify which nodes can be permitted to this role for add, edit, delete or all options.
2. Add Users or Teams
Next, add the collaborators and assign them the roles you’ve created.
Go to Users / Teams Screen
Navigate to:
Left Drawer Menu > Collaboration > Users or Teams
Click on “Add new” button
in Users Screen:
A modal will appear where you’ll need to fill in:
- First Name
- Last Name
- Email Address (required)
- Permission Role (required – select from dropdown)
Choosing the permission role is where you assign the role to the User. - Click Save
👉 Read more about Users
In Teams Screen
A modal will appear where you’ll need to fill in:
- Team Name
- Description
- Permission Role (required – select from dropdown)
Choosing the permission role is where you assign the role to the Team. - Click Save
👉 Read more about Teams
Real-Time Collaboration: How It Works
When multiple users collaborate:
- Every action (like adding/editing connections or flows) is tracked by user, so you always know who did what and when.
- In the flow builder, you’ll see avatars of other users currently working on the flow with you.
- If someone is editing a node, it becomes locked for others, preventing accidental overrides.
This enables safe, structured, and traceable collaboration—perfect for large teams or cross-functional projects.
Summary
With Noca AI’s collaboration tools, working on complex automation flows becomes a team-friendly process.
You can:
- Assign roles for fine-grained access
- Work in parallel without conflicts
- Track every change by user
- Grant specific permissions per node or project
Start collaborating today and let your whole team build faster, smarter flows—together.