
Adding a Node in the Flow Builder
When you build a flow – whether Noca AI helped you set it up or you did it all manually—you’re really just snapping together little building blocks called nodes. Think of your flow as a process streamlining map – often with several possible routes: events trigger actions, AI steps do their magic, and logic nodes help you decide “what’s next.” Nodes are the simple shapes on that map that make it all happen.
Watch & Learn
What Is a Node?
A node is the basic step in your flow – usually a small shape with an icon/logo inside to represent it. Think of it as a milestone in your process: pick up an email, call an API, run an AI agent, evaluate a condition, or loop through a list – these are all examples of nodes
Node Shapes & What They Mean
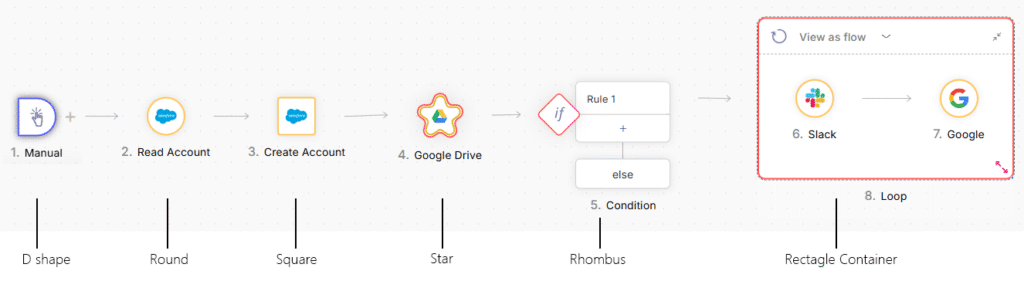
Each shape tells you at a glance what kind of step you’re looking at:
Round
the most common shape for nodes.
Square
symbolizes a Write action (editing or adding data)
Star
an Event (something has happened—new email, new record, etc.)
D-shape
a Flow Trigger (starts the entire flow)
Rhombus
a Condition (branches based on yes/no or multiple options)
Container (Rectangle)
a special node that holds other nodes inside of it. For example a Loop or Run Flow.
Adding Your First Node
Create a new flow
You will see only a ➕ button. and the Add Node modal will pop up automatically.
Only one tab will be initially available in it:
- Events & Triggers

Choose an event/trigger to start the flow
For example, Manual, and click on “insert” button to add it to your canvas.
Add More Nodes
Hovering over the second node, and click on the ➕ to add another node after it.
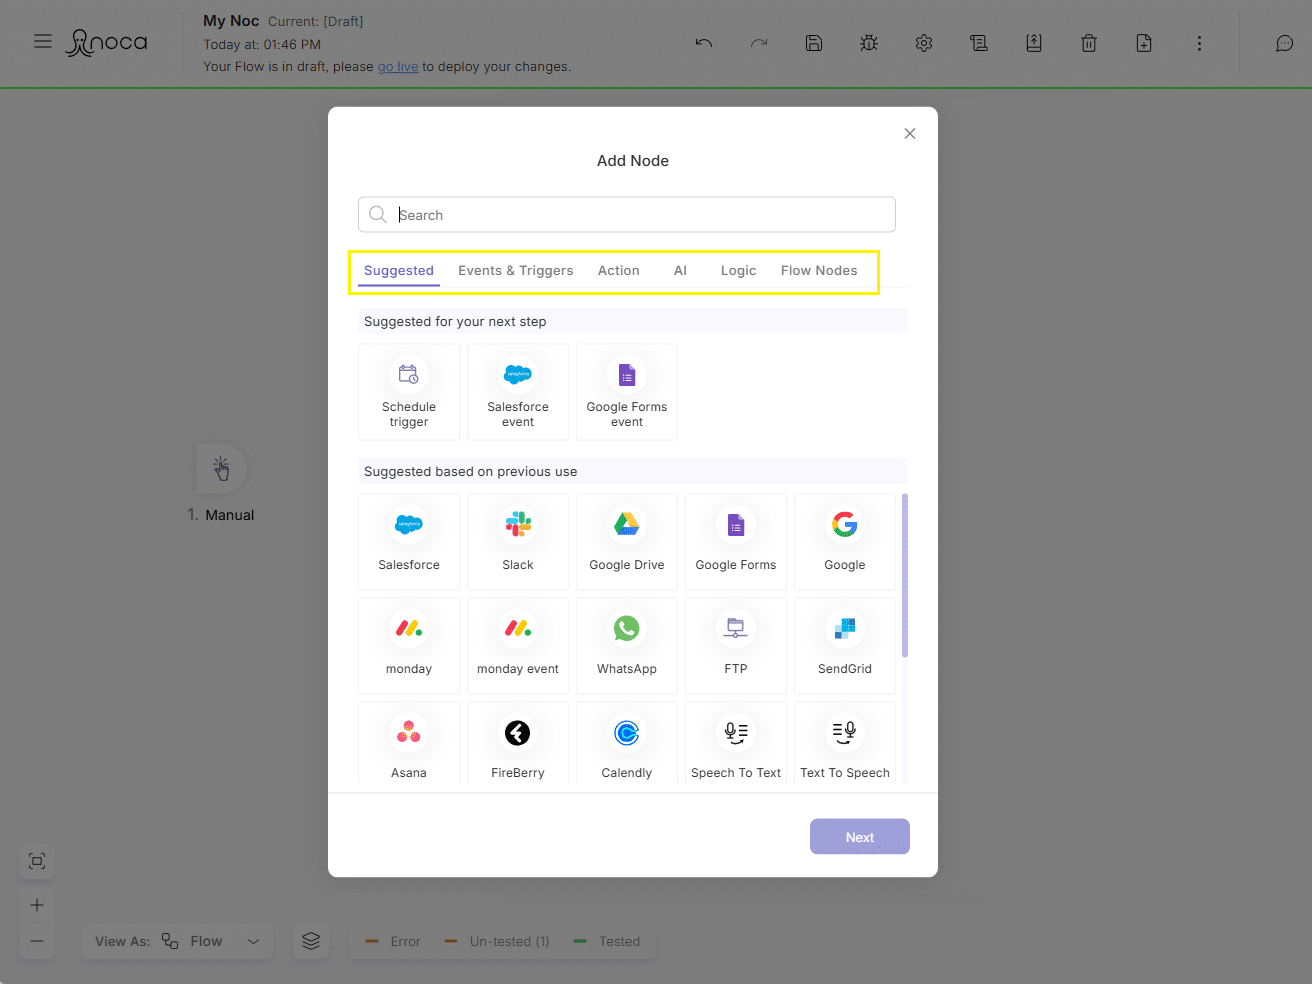
This will reopen the Add Node modal – now with all six tabs unlocked.
- Suggested
- Next Steps (top): AI-powered recommendations for what to add after your current node
- Your History (bottom): nodes you’ve used before, based on Noca AI’s understanding of your habits
- Events & Triggers – same as the initial tab
- Actions – connect to services like Salesforce, Slack, Stripe, etc.
- AI – choose from AI agents (presentation generation, text-to-speech, and more)
- Logic – add conditions, loops, or API-response handlers
- Flow Nodes – reuse any node already in your flow and tweak its settings
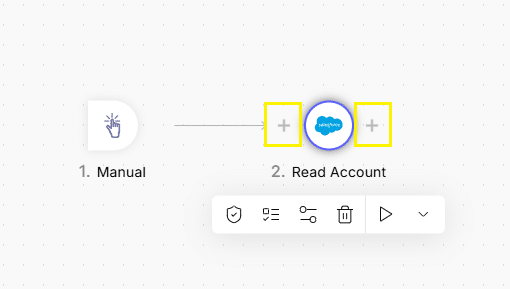
- After the first two nodes, hovering over any node will reveal two ➕ icons – one on its left and one on its right. Use these to insert a new node before or after the hovered node. Clicking either + icon will reopen the Add Node modal with all six tabs unlocked.
Node Configurations
Some nodes require no setup and drop onto the canvas immediately. However, most nodes need a brief configuration—typically one or two steps to establish connections or mappings (for example, Salesforce)—before they can be inserted.
Node Status Indicators
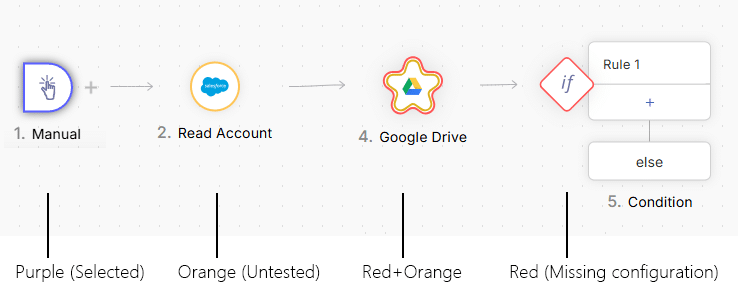
Once on the canvas, nodes may have colored borders symbolizing their status:
🟥 Red – missing required settings (unmapped fields)
🟧 Orange – untested (we recommend testing every node)
🟥🟧 Red + Orange – both missing settings and untested
🟪 Purple – currently selected (shows you what you’re editing)
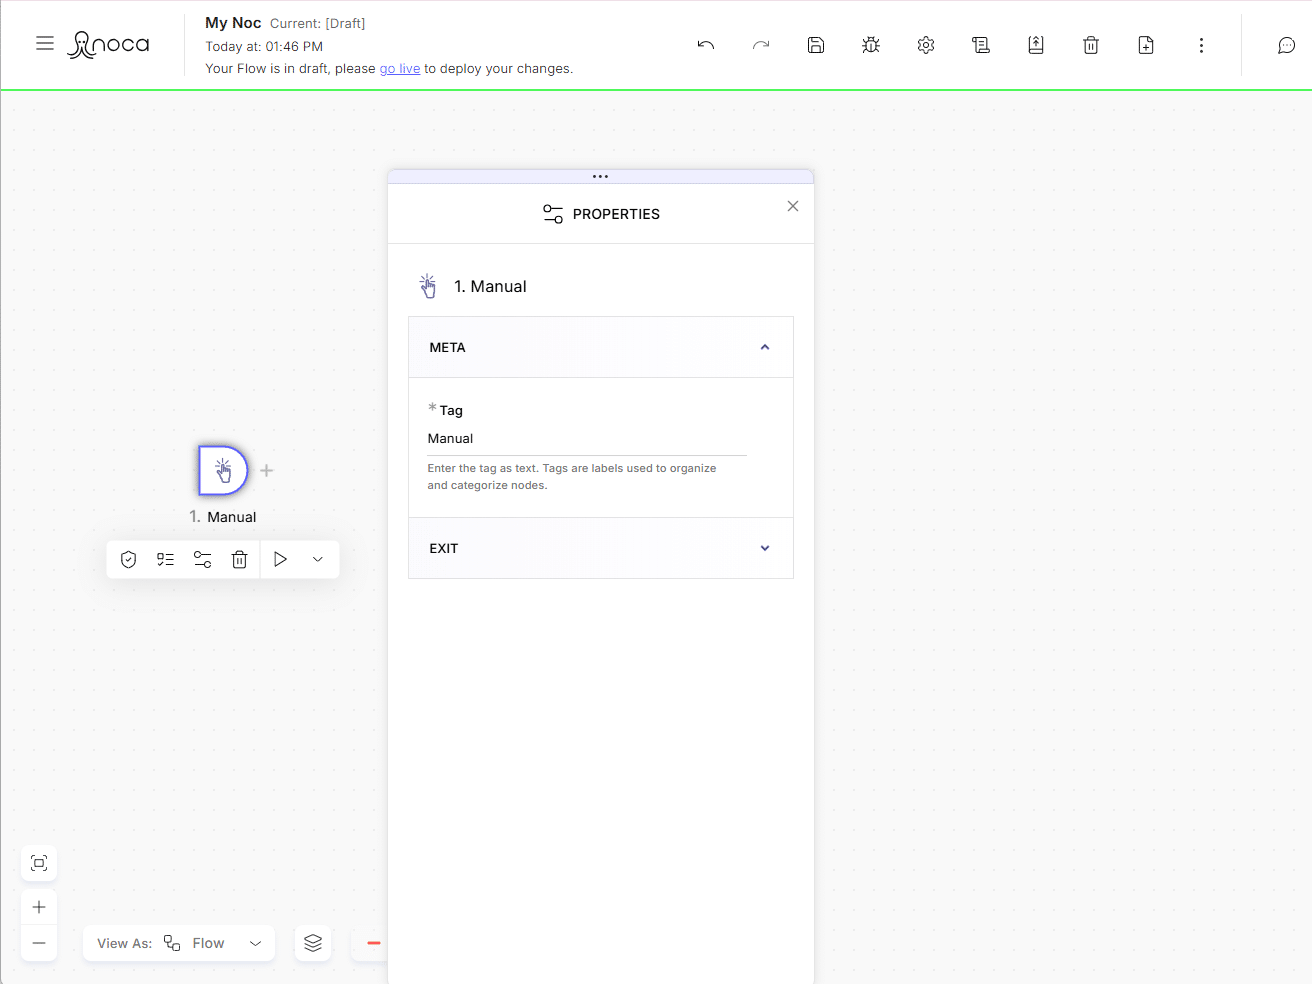
Editing a Node
Click any node to open its Properties panel on the right. From here you can:
- Fill in or adjust settings
- Map inputs and outputs
- Rename the node for clarity
- Test or re-validate its configuration