
Variable Action Node
Overview
The Variable Action Node lets you apply a chosen operation—such as Set, Incremental Set, Decremental Set, Reset, or Clear—to any variable in your flow. While its primary role is to modify variable values at a given point, it also provides a built-in option to create or manage variables on the fly, eliminating the need to switch contexts just to define new storage for your data.
How to Use the variable action Node
Step-by-Step Instructions
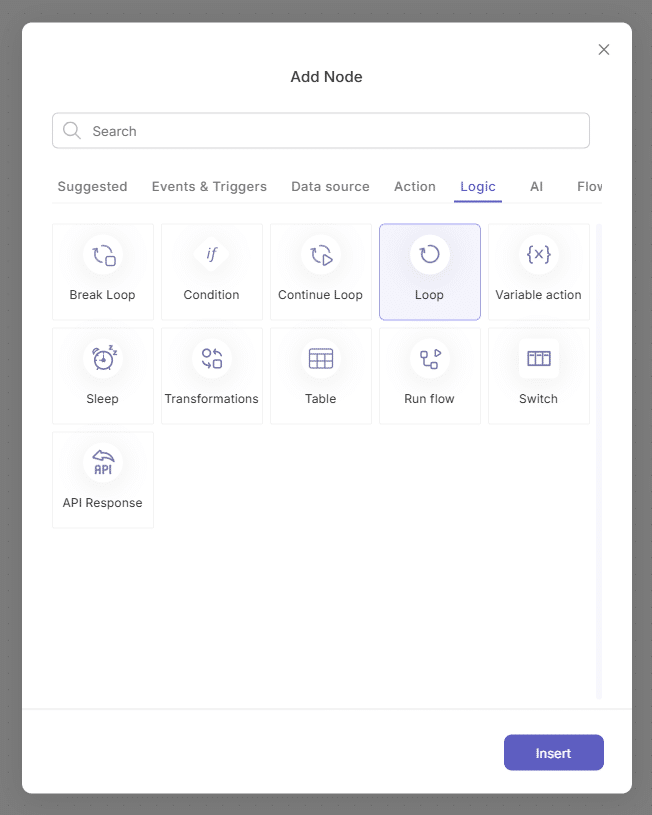
Open the Add Node Modal
In the flow builder, click the “+” button to launch the Add Node modal.
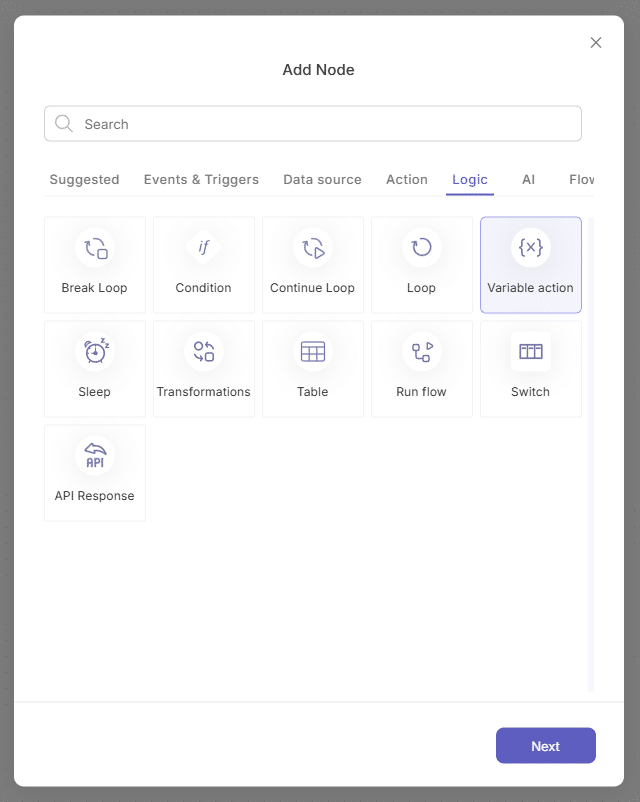
Select the Variable Action Node
- Switch to the Logic tab or type “variable action” in the search box.
- Click Variable Action and then Next.

Configure the Node
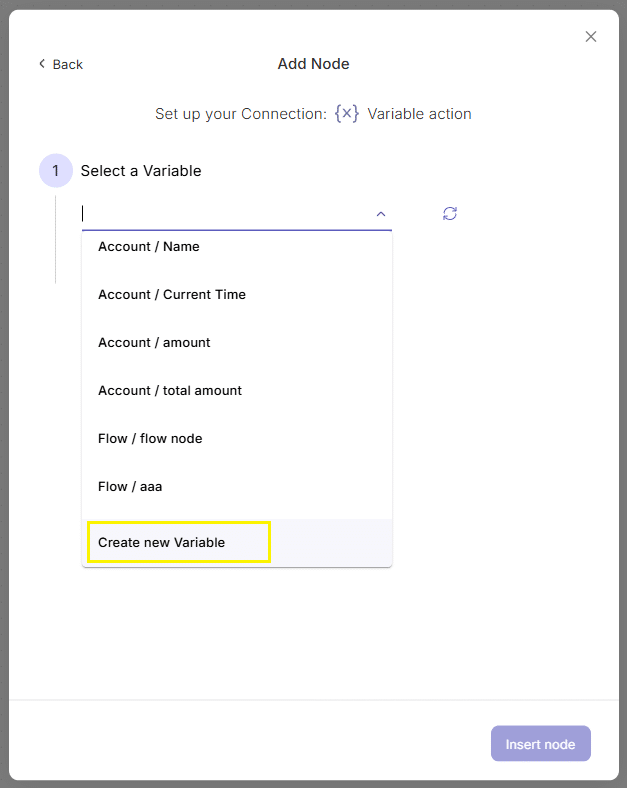
- Variable: Choose an existing variable from the dropdown, or scroll to the bottom and click Create new variable.
- Action: Pick one of the following operations:
- Set
- Incremental Set
- Decremental Set
- Reset
- Clear
- Value: Either enter a static value or drag in a dynamic field from a previous node (via the Data Kit).
- Click Insert Node to add it to your flow.
Referencing Your Variable in Later Nodes
Add another node after the Variable Action Node.
Open its Mapping category.
Under Data Kit > Variables, locate your variable (you can search or browse by category).
Drag it into any input field to use its current value.
Example 1: Storing the Number of Records (Set Action)
In this example, we’ll:
- Read 20 Opportunity records from Salesforce.
- Store the record count in a variable.
- Send that count via Slack.
Steps:
Create a new flow and add a Manual Trigger node.
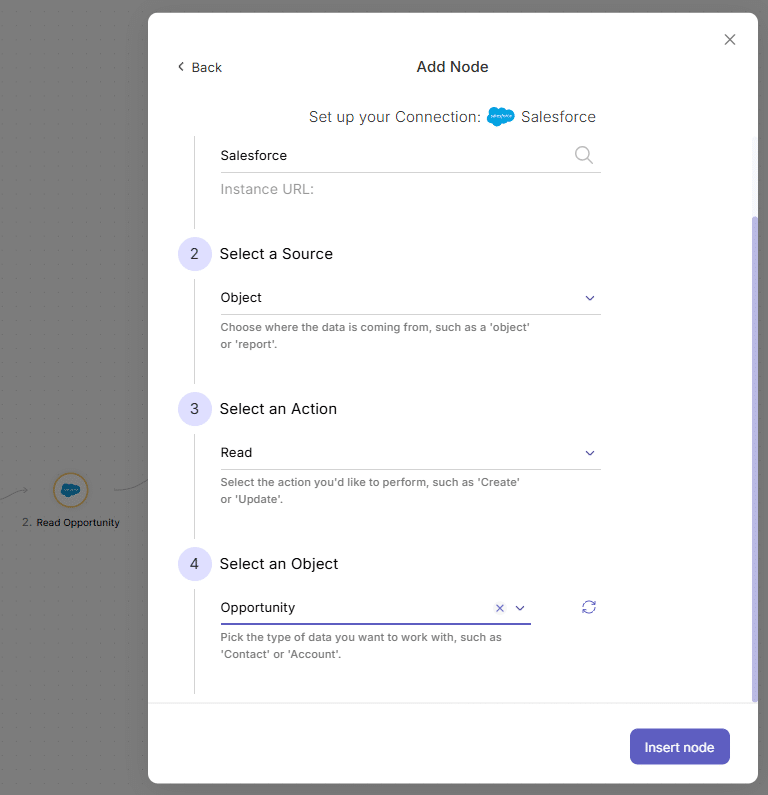
Click “+” to the right of the trigger to add a Salesforce node
In the Salesforce node:
- Select your connection
- Source: Object
- Action: Read
- Object: Opportunity

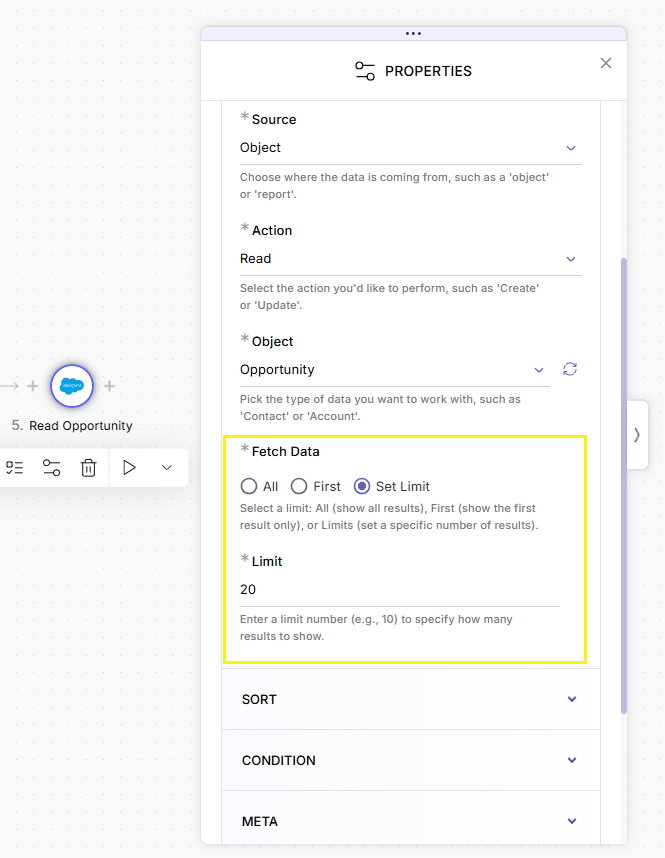
Once the node is added on canvas, configure:
- Under Fetch Data, choose Set Limit
- Set the limit to 20

Click “+” to the right of the Salesforce node, then add a variable action node
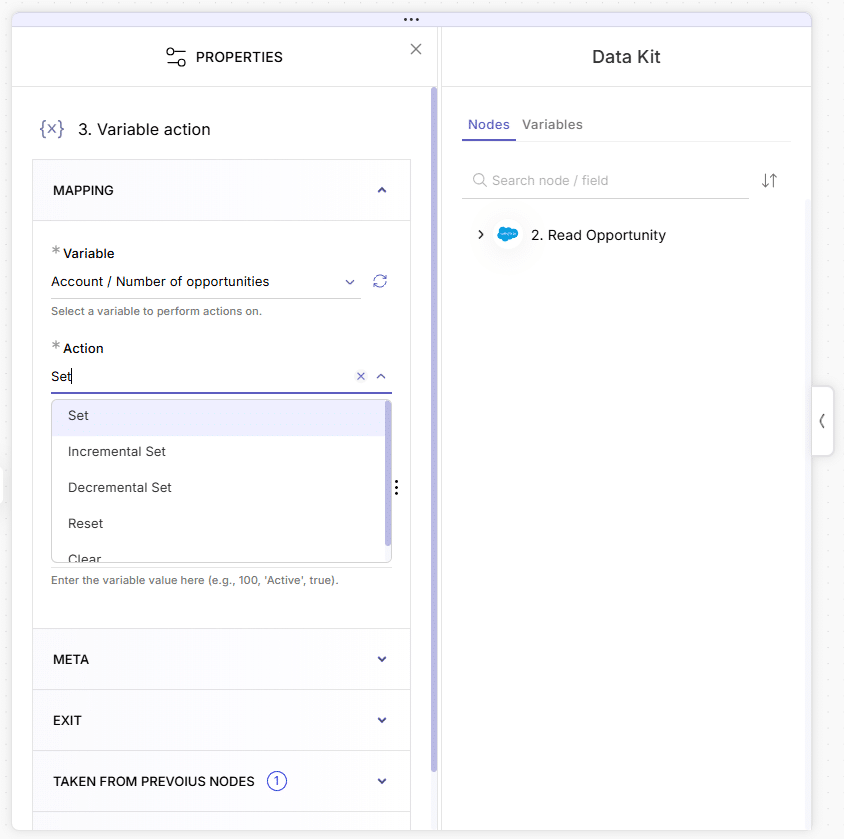
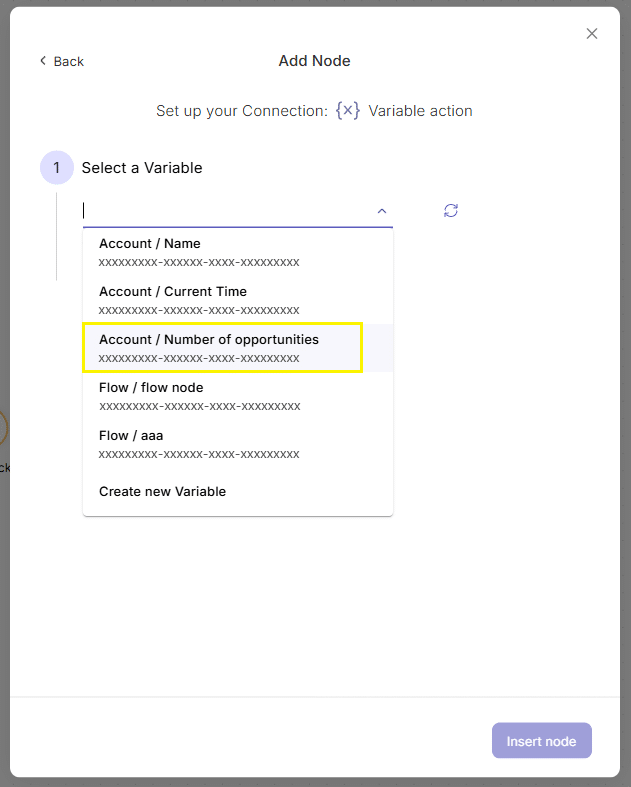
Select a variable: open the dropdown, scroll to the end and click “create new variable”
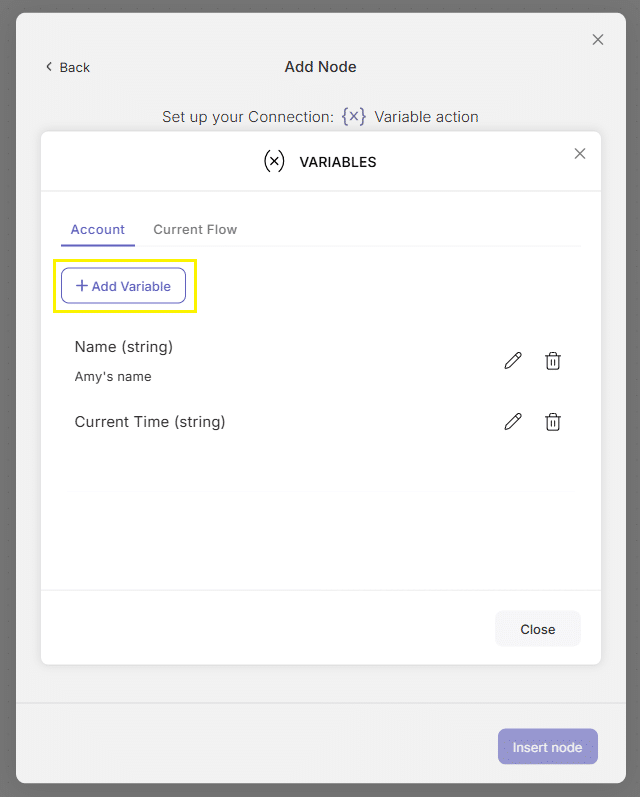
Click “add variable” button in the pop up modal
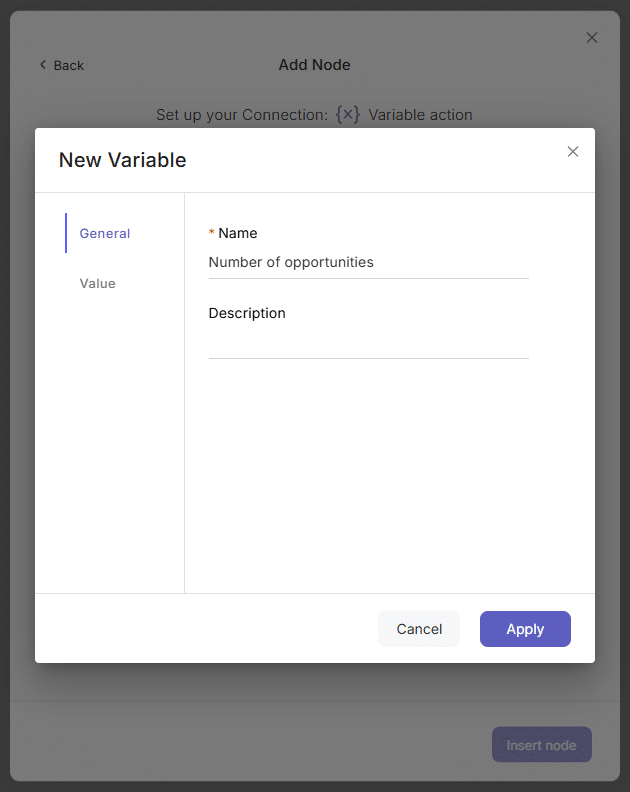
In the “new variable” modal that opens configure:
- Name: Number of opportunities
- Value:
- data type: integer
- Default value: 0
Press “Apply” and then “Close”.
Read more about using Variables
Now this variable will be added in the “Select a value” dropdown, so open it and select the variable.
Select the action you would like this variable from the following options:
Action: Set
Select a value:
Go to the Data Kit > 2. Read Opportunity > system fields > match # of records
Drag the match # of records field into the “value” input
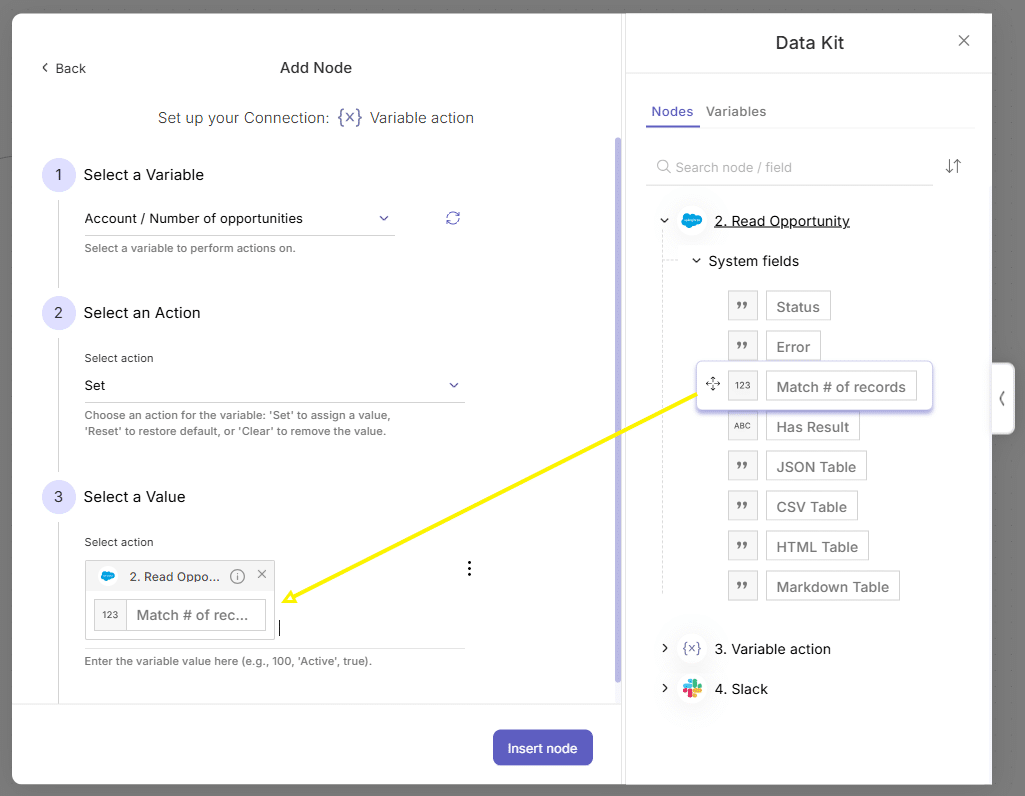
Click “insert node”
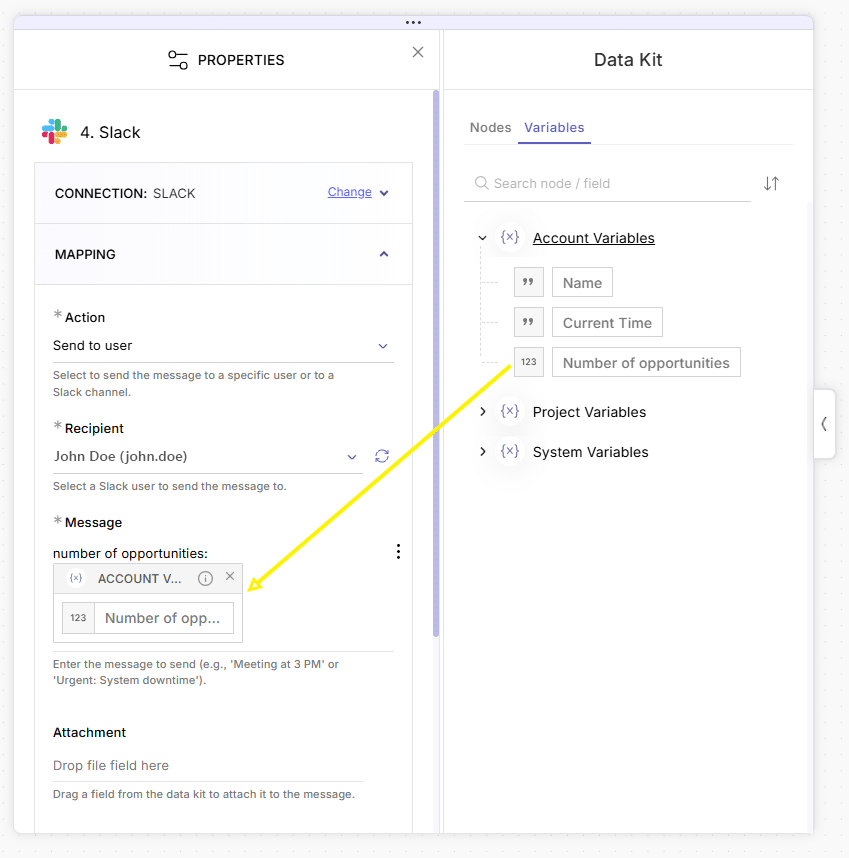
Click “+” to the right of the Variable Action node, and add a Slack node:
- Choose your Slack connection
- Action: Send to User
- Recipient: John Doe
- Message:
- Type the text: Number of opportunities:
- Go to Data Kit > variables > Account variables > Number of opportunities
- Drag the Number of opportunities field after the text you entered in the “message” input.

Save your flow, and run a test
Example 2: Using a variable for storing a cumulative sum (Incremental Set action)
Here, we’ll:
- Read 20 Opportunity records from Salesforce.
- Create a loop that will run once for each record.
- Accumulate the Amount field into a variable.
- Post the final total to Slack.
Steps:
Create a new flow and add a Manual Trigger.
Click “+” to the right of the trigger to add a Salesforce node
In the Salesforce node:
- Select your connection
- Source: Object
- Action: Read
- Object: Opportunity
Once the node is added, configure:
- Under Fetch Data, choose Set Limit
- Set the limit to 20
Click “+” to the right of the Salesforce node, and add a “loop” node.
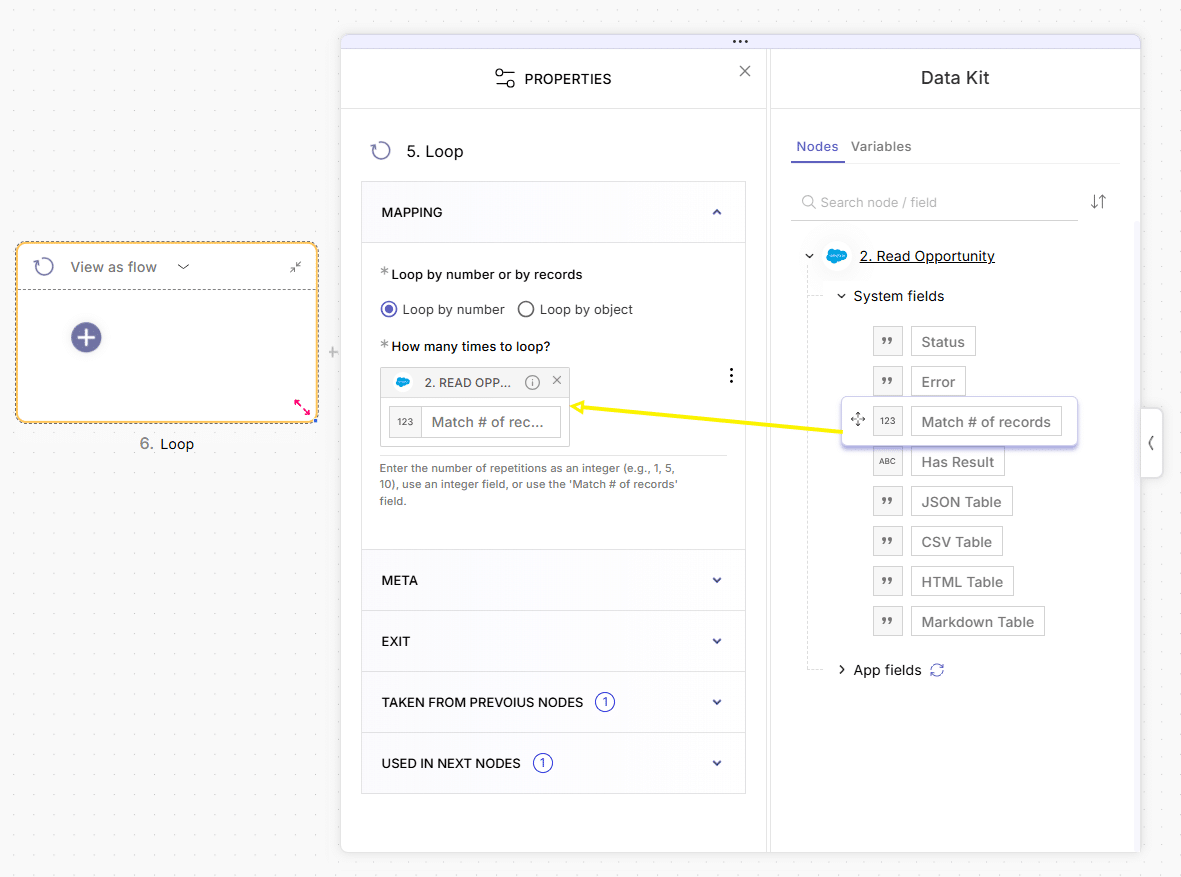
In the Loop’s properties panel set the number of times it is going to run:
- Loop by number or by records (radio button) : choose “ loop by number” in the radio button
- How many times to loop (input): Go to the Data Kit > 2. Read Opportunity > system fields > match # of records.
Drag the match # of records field into the input.This will make sure that the loop will run as many times as the results of the read operation in the previous nodes.

Now configure the the process you want to loop:
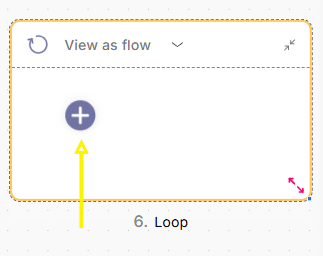
- Click on “+” button inside of the loop and add a variable action node.

Create a new variable
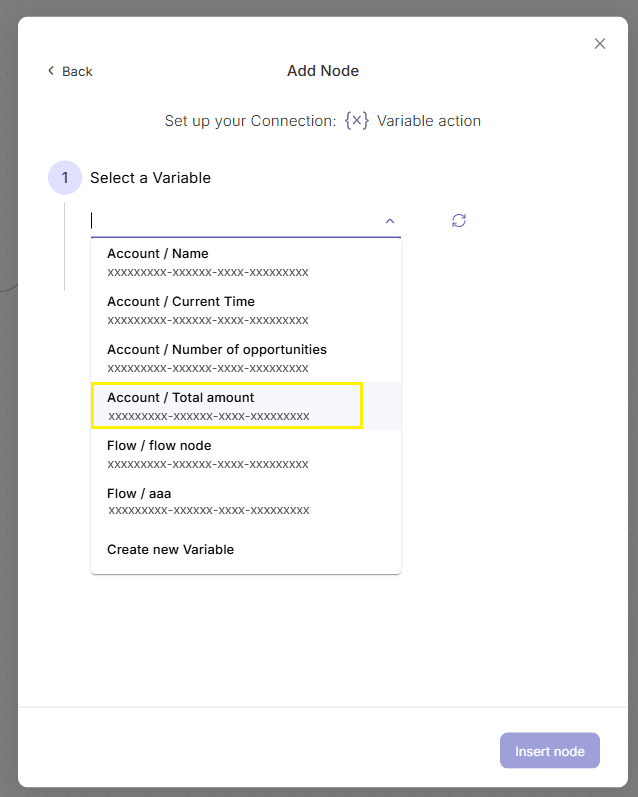
- Select a variable: open the dropdown, scroll to the end and click “create new variable”.

- In the variables pop up, Click “add variable” button

- In the “new variable” modal that opens configure the variable:
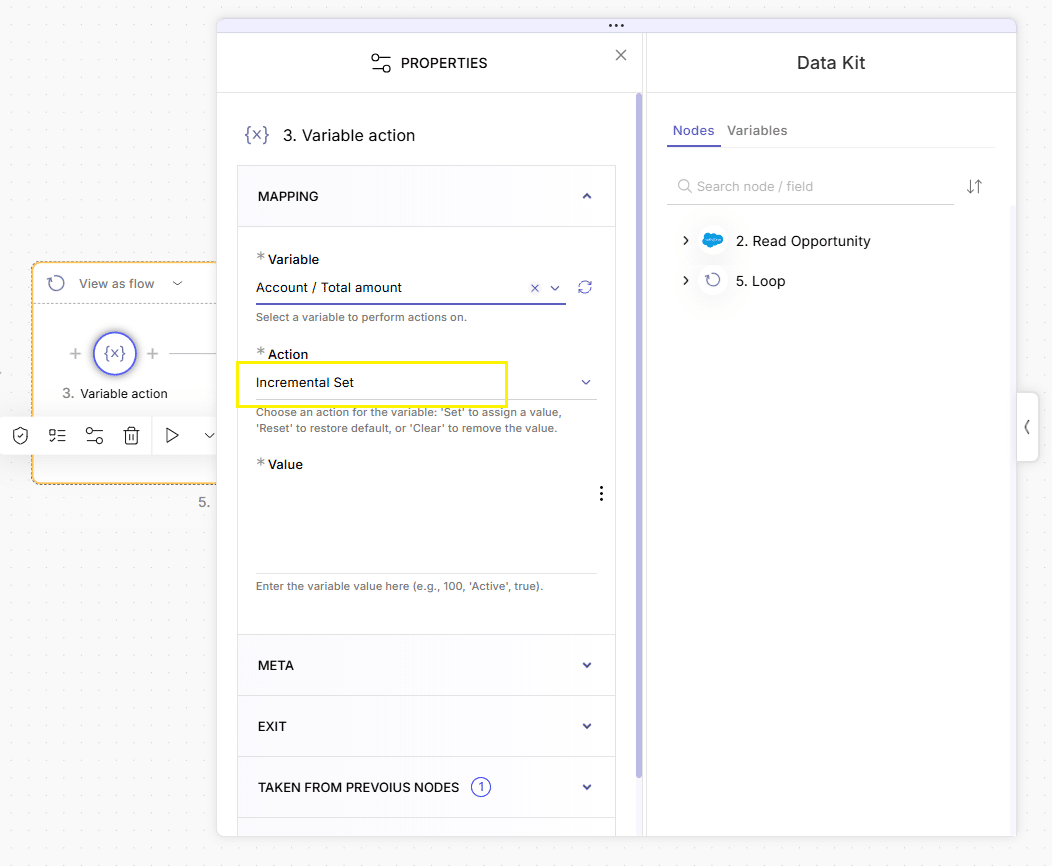
– Name: Total amount
– Value: 0 - data type: decimal
- Default value: 0
Press “Apply” and then “Close”.Read more about using Variables
Now this variable will be added in the “Select a value” dropdown.
- In the “new variable” modal that opens configure the variable:
Open the “Select a value” dropdown and select the new variable
Select the action you would like this variable from the following options:
Incremental Set
Select a value:
- Go to the Data Kit > 2. Read Opportunity > App fields > Amount
- Drag the Amount into the “value” input

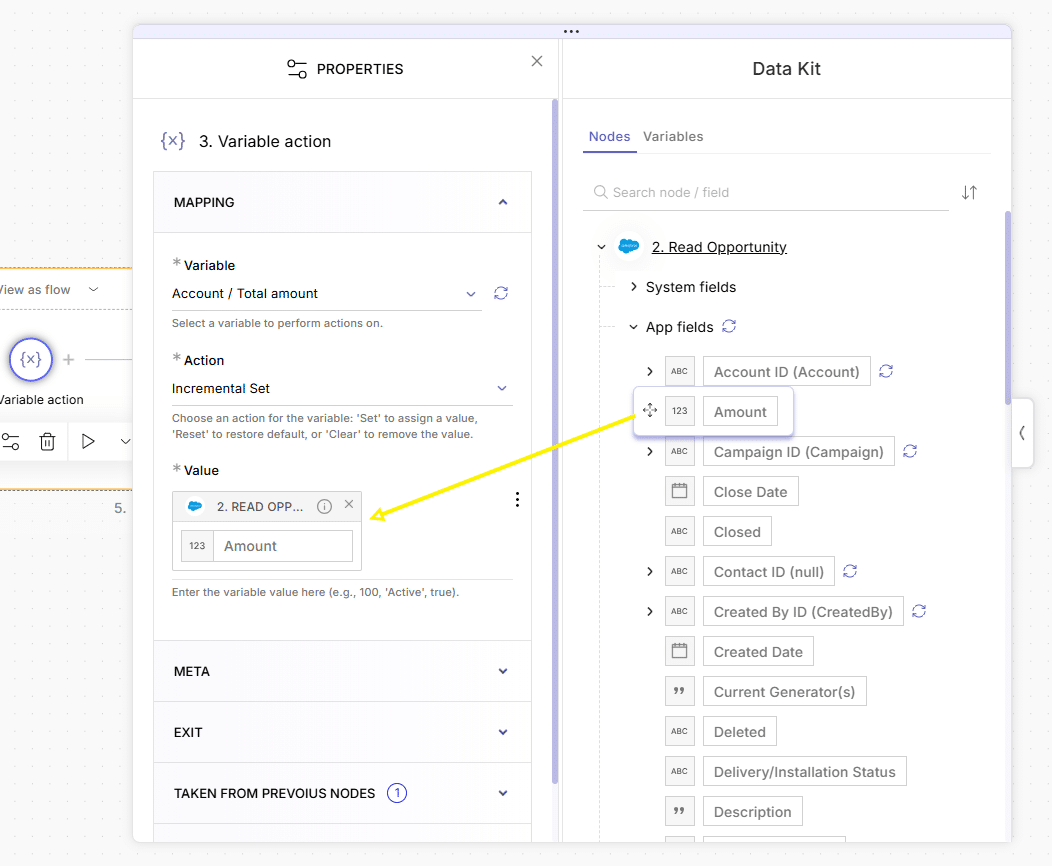
Click “insert node”
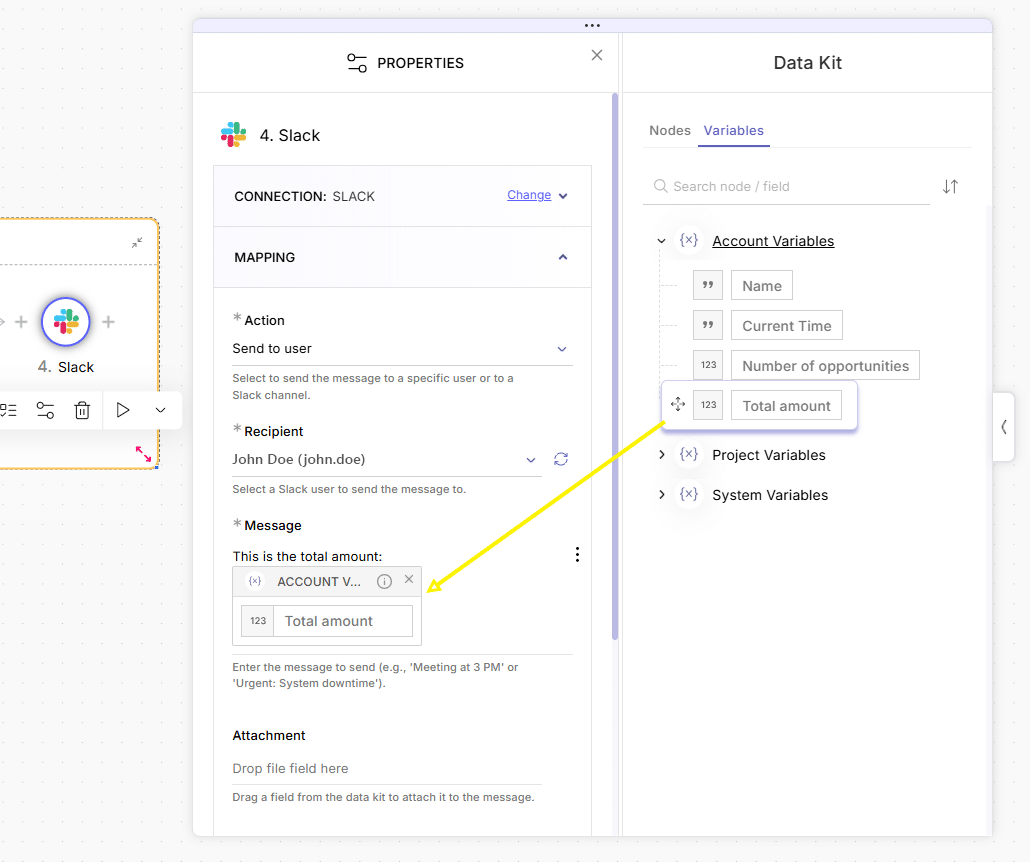
Now Click “+” to the right of the variable action in the loop, and add a Slack node:
- Choose your Slack connection
- Action: Send to User
- Recipient: John Doe
- Message:
- Type the text: This is the total amount:
- Go to Data Kit > variables > Account variables > Total amount
- Drag the Total amount field after the text you entered in the “message” input.