Table Node
Overview
The Table Node is a logic-type node in Noca AI that allows you to create tabular data structures within your flow. You can dynamically build tables using values from previous steps and reuse this data across nodes—in formats like JSON, Markdown, HTML, or CSV.
How to Use the Table Node
Adding the Table node
In the flow builder, click the “+” button to open the Add Node modal.
Go to the Logic tab or search for “Table” in the search box.
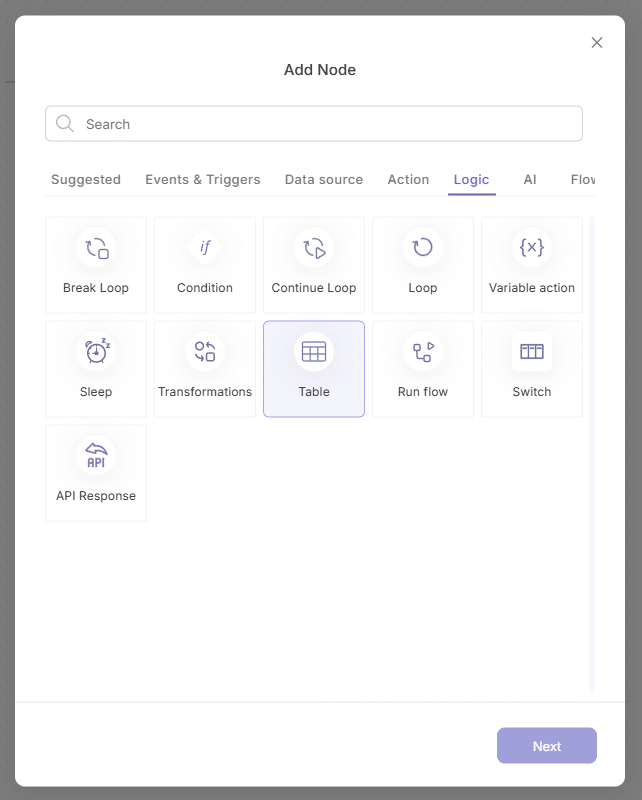
Select the Table node and click “Insert”.
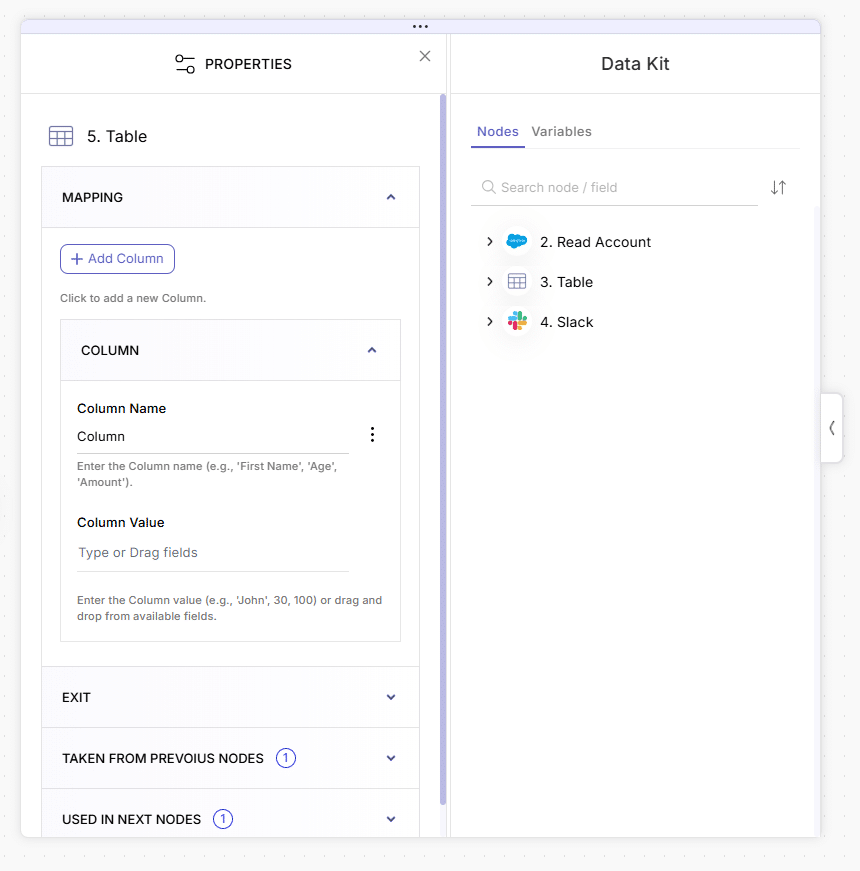
Once added to the canvas, the Properties Panel will open automatically:
- The Mapping category will be collapsed.
- The first column configuration will be expanded and ready for input.
Configuring Columns
Column Name
You can leave this field empty at first—it will be auto-filled based on the value you set below.
If you still want to change the name after that you can do so.
Column Value
Define what data will populate the column rows. You can:
- Enter a static value manually
- Or drag a dynamic field from the Data Kit (on the right)
Click “Add Column” to repeat this process and build out your table with more fields.
Once your table is configured, you can use it in subsequent nodes.
Using the Table in Other Nodes
To reference your table data in a later step:
Add a new node after the Table node
Open the Mapping category in its properties
Go to the Data Kit > Nodes Tab > Table Node
Choose your preferred table format (e.g., JSON, Markdown, HTML, CSV)
Drag the field into the desired input
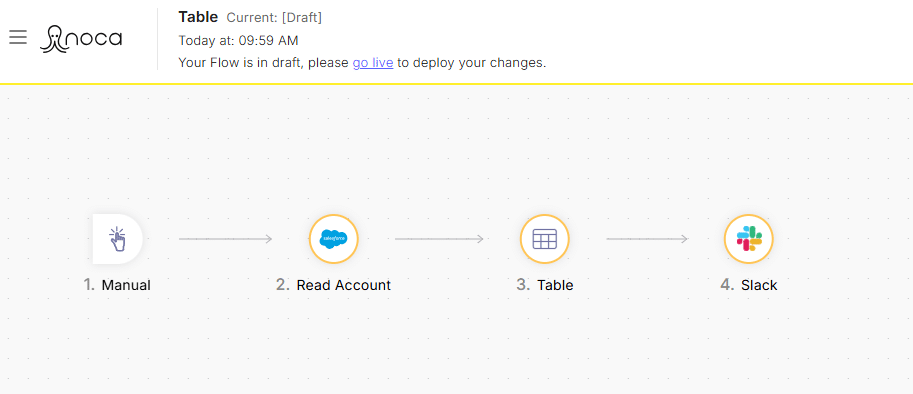
Example: Creating and Sending a Table via Slack
Let’s walk through a real-world example where we:
- Fetch 5 Account records from Salesforce
- Create a table with Account Name and Account ID
- Send that table as a JSON Table in a Slack message
Steps
Create a new flow
Add a Manual Trigger node
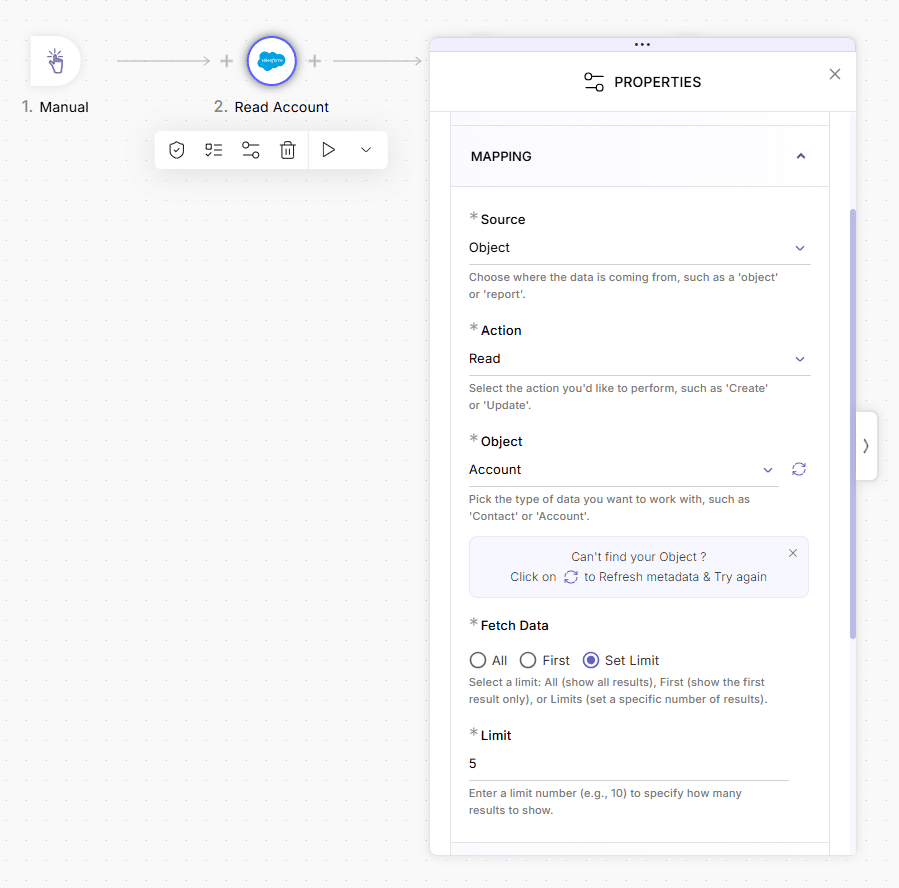
Click “+” to the right of the trigger to add a Salesforce node
In the Salesforce node:
- Select your connection
- Source: Object
- Action: Read
- Object: Account
Once added, configure:
- Under Fetch Data, choose Set Limit
- Set the limit to 5
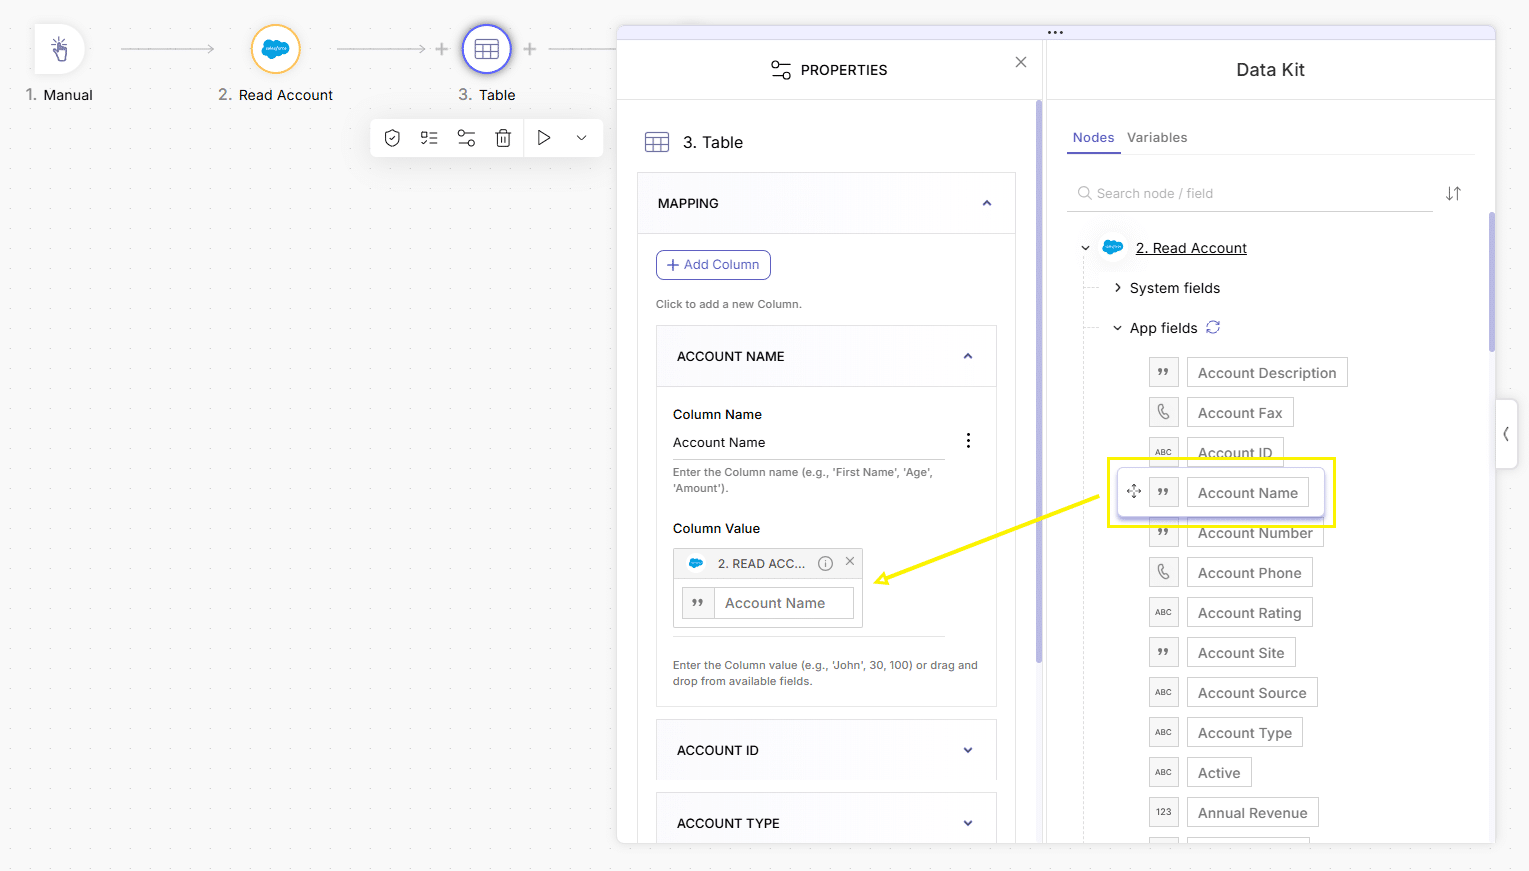
Click “+” to the right of the Salesforce node, then add a Table node
In the Table node’s properties:
- Column 1:
- Column Name: (leave empty)
- Column Value: Go to Data Kit > Nodes Tab > 2. Read Account > App Fields > Account Name
→ Drag into the input
- Column 2:
- Click “Add Column”
- Column Name: (leave empty)
- Column Value: Data Kit > Read Account > App Fields > Account ID
→ Drag into the input
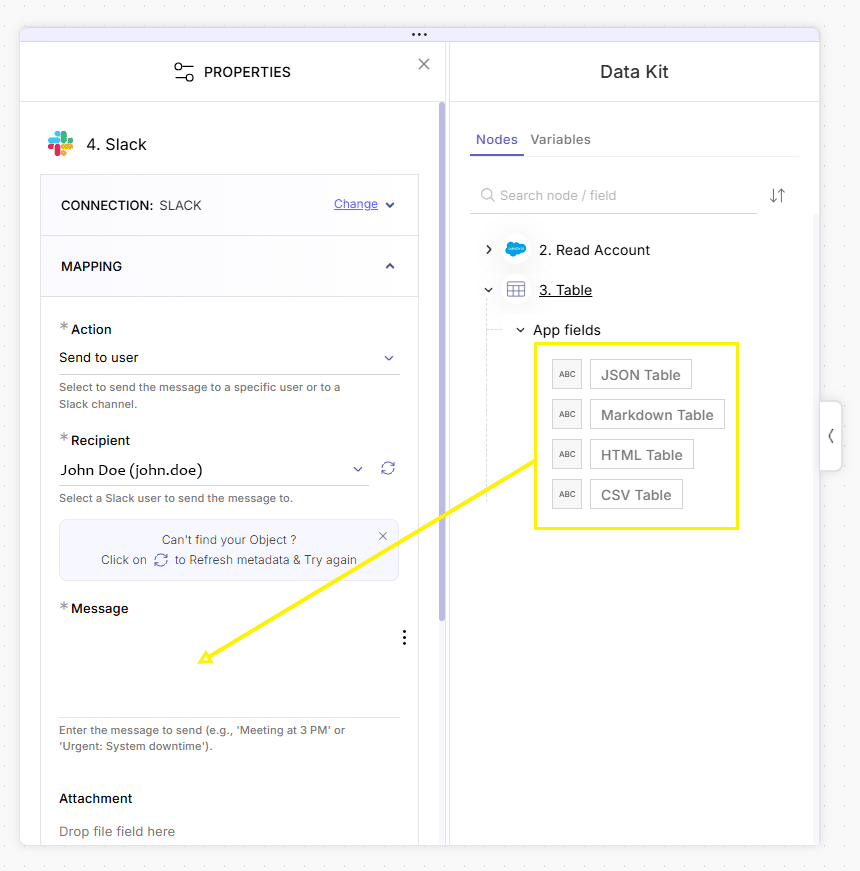
Click “+” to the right of the Table node, and add a Slack node:
- Choose your Slack connection
- Action: Send to User
- Recipient: John Doe
- Message:
- Go to Data Kit > Nodes Tab > 3. Table > App Fields > JSON Table
- Drag the JSON Table field into the Message input
Click Insert, save your flow, and run a test
Summary
The Table Node is a powerful way to organize, visualize, and reuse structured data across your automation. Whether you’re sending data in Slack, preparing reports, or building visual summaries—tables help bring clarity and structure to your flows.