
How to use the Autonomous Trigger node
The Autonomous Trigger node is a D-shaped start node—just like other triggers—but outlined with a dotted border to indicate its AI-driven nature. Instead of manually scheduling or wiring up conditions, you simply describe what you want done and when, and Noca AI configures the trigger for you.
Adding the Autonomous Trigger
Create a new flow
When you open your canvas, the Add Node modal appears automatically.
Insert the Autonomous Trigger
In the Events & Triggers tab, select Autonomous Trigger and click Insert.

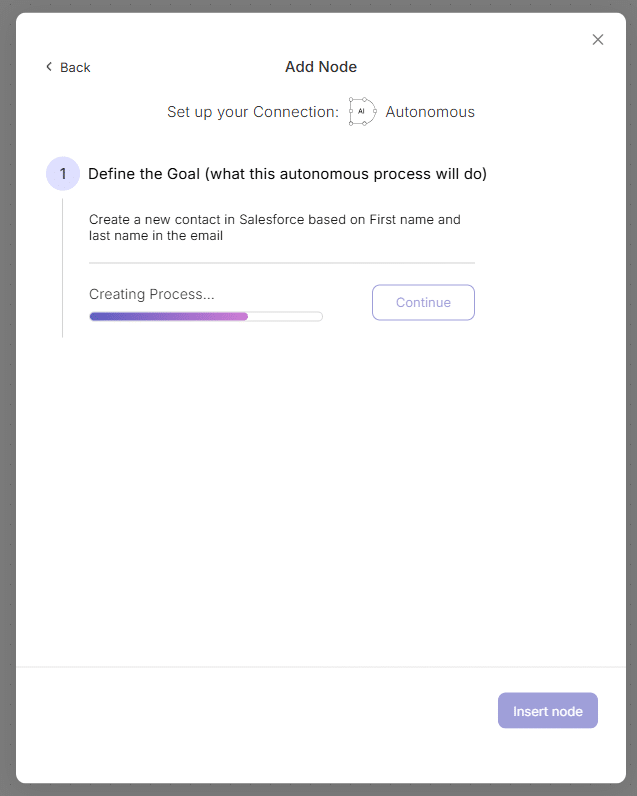
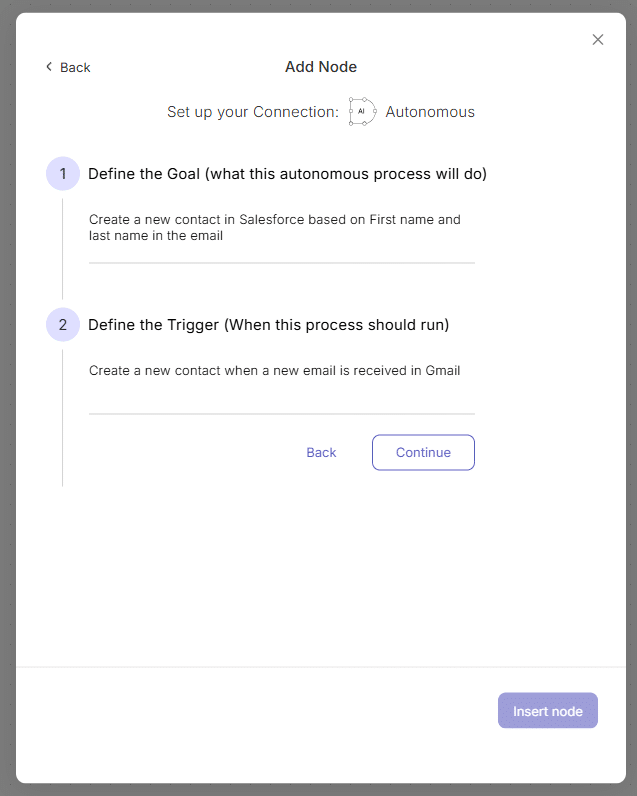
Provide natural-language descriptions
A. Define your goal
Describe what you want the process to accomplish (e.g., “Fetch new support tickets from Zendesk”).
Click Continue.
B. Define the trigger
Describe when this should run (e.g., “Every time a ticket’s priority is set to ‘High’”).
Click Continue.
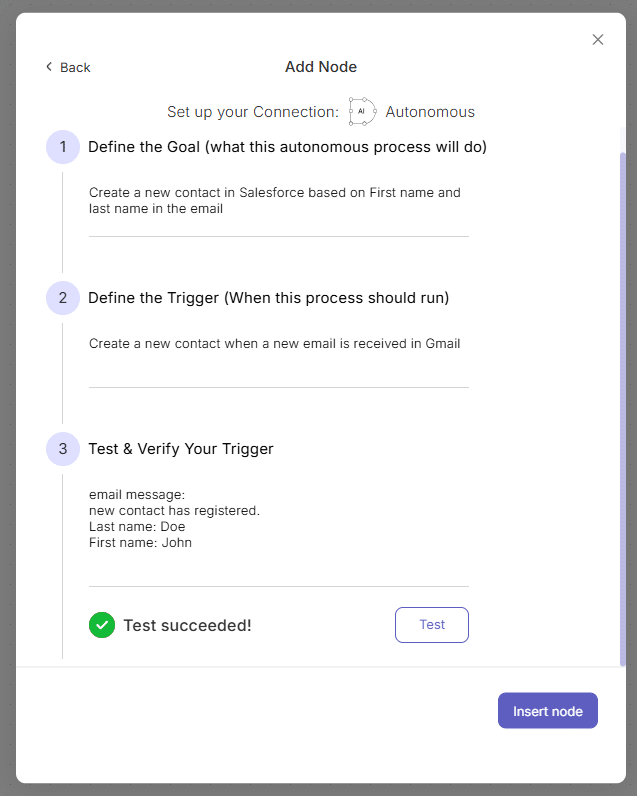
C. Test and verify
Enter sample data that mimics what your real inputs will look like, then click Test.
- If the test succeeds, you’ll see a Test succeeded confirmation.
- If it fails, a popup will suggest tweaks to your prompts so the trigger will fire as intended. Once your test passes, click Insert to finalize the node.
Adjust properties (optional)
After insertion, the dotted-border D-shaped node will appear on the canvas and its properties panel opens beside it. You can rename it or refine its prompts if needed before saving or running your flow.