How to Use an Event to Trigger Your Flow
Watch & Learn
Overview
A common way to trigger a flow is by using events. Events let you listen to a specific service or app, and when something changes there, it serves as the starting point for your flow. An event refers to the specific occurrence that triggers the action. It can be:
- User Interaction: a button click, a text‐box change, or a form submission
- Data Change: an insertion, update, or deletion of data in a database
- System Event: a network connection, file upload, or a specific error
- External Event: a message from a queue, a sensor reading, or a change in a third-party service
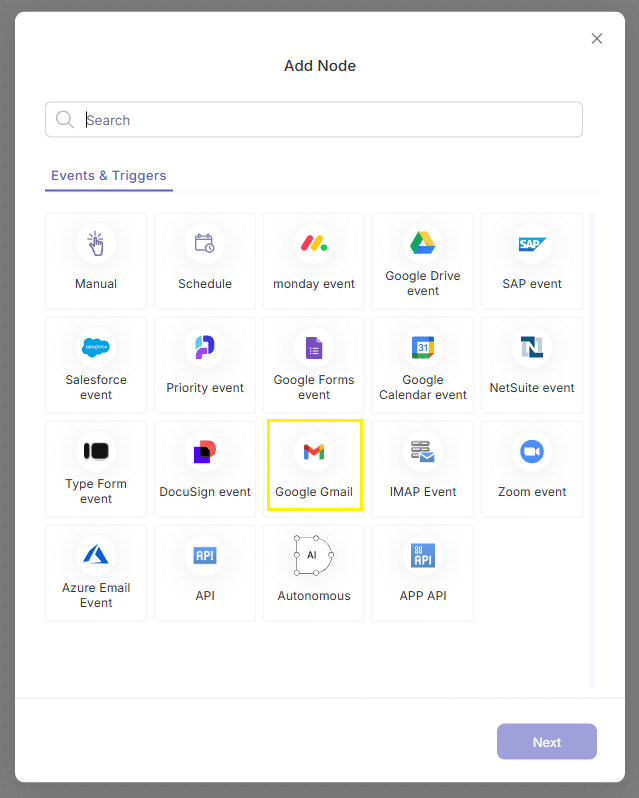
When you create a new flow, the Add Node modal opens automatically with the Events & Triggers tab selected. You’ll find many built-in event sources—Salesforce, Google Forms, Google Calendar, NetSuite, Zoom, API events, and more—that each can act as the starter for your flow.
* Please note that an event node has a special shape on the canvas—a star—so it’s easy to spot your triggers at a glance.
Steps to Add an Event Trigger
Select an event
Click the tile for the service you want to listen to
For example, Gmail Event.
Configure required settings
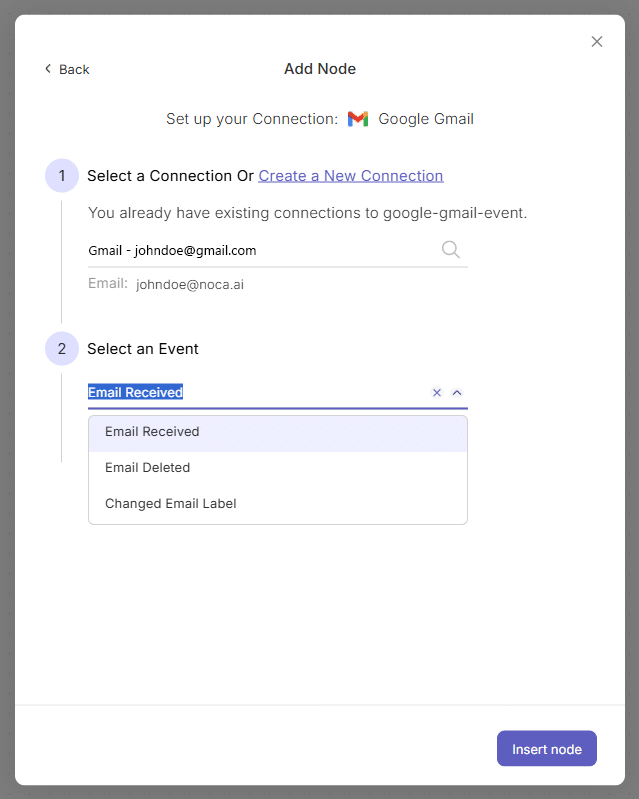
Each event node has its own set of required configurations:
- Connection: Select an existing account (e.g. johndoe@noca.ai) or create a new one.
- Service-specific fields: Depending on the service, you may need to set:
- Event type (e.g. “Email received”)
- Form or form ID (for Google Forms)
- Calendar ID (for Google Calendar)
- API token or credentials
etc.
Insert the node
Click Insert Node. The event node is added to your canvas and its properties panel opens alongside it.
Notice the node has a star shape – this represents an “Event”.
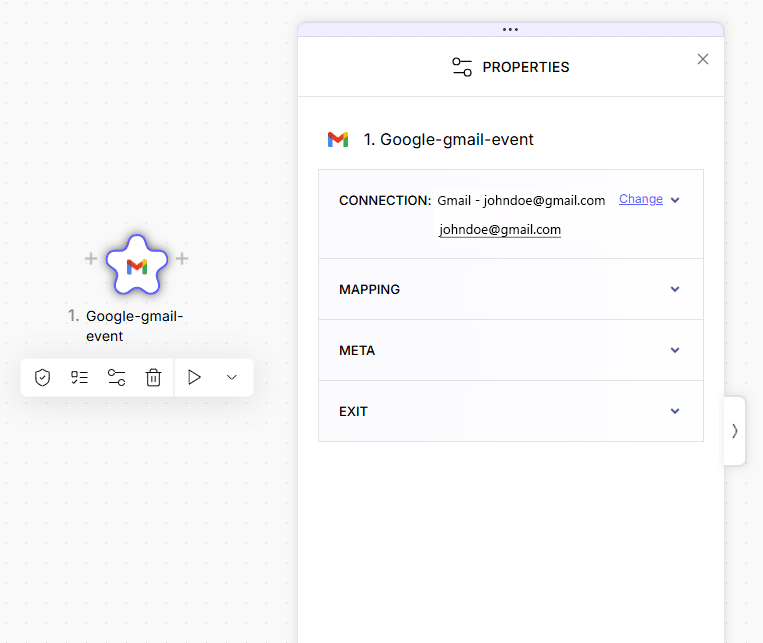
Fine-tune additional options
In the properties panel you can then adjust all of the properties (Connection, Mapping, Meta, Exit etc.)