

Creating a new custom chat
Easily craft custom conversational experiences that fetch and display data as well as perform needed actions for the user.
Step by step Instructions:
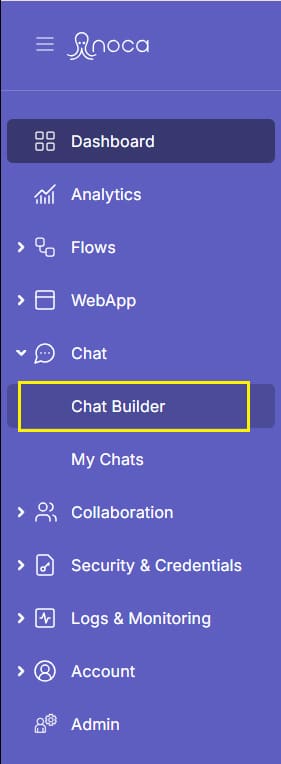
Navigate to the Chat Builder
Left drawer > “chat” category > chat builder
Configure your chat based on the categories in the left menu:
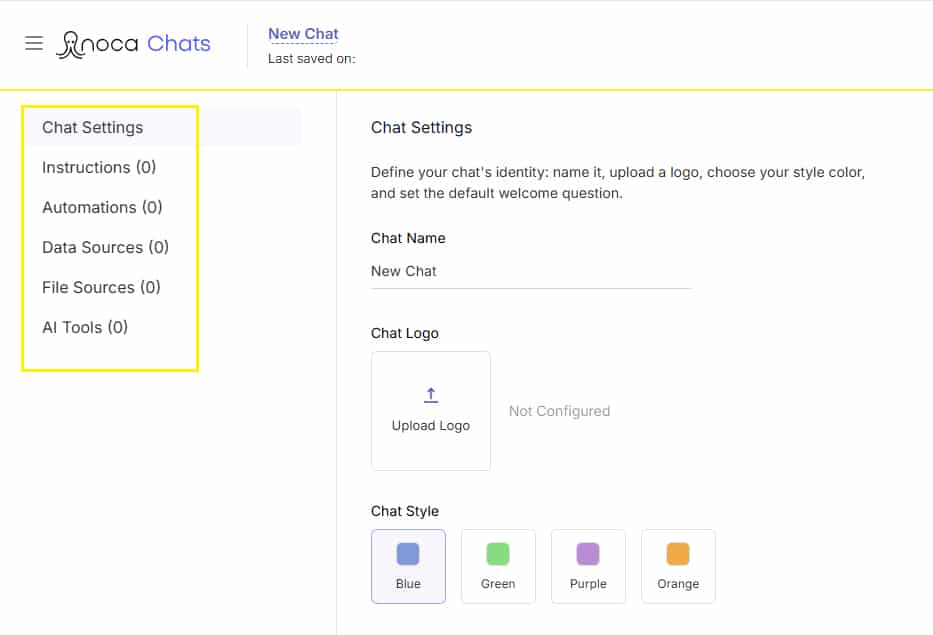
With General Settings, Instructions, Automations, Data Sources, and File Sources in place, you can build rich, data-driven chats that feel both natural and powerful—answering anything from “What opportunity types do we have?” to “Summarize the attached report for me.”
- Chat settings
Define your chat’s identity: Name, logo, style and default welcome message.
Read more about the general settings - Instructions
Upload documents that contain clear instructions on how to sequence the conversation with the user.
Read how to add instructions - Automations
Define what the chat can do by selecting saved automations or creating new ones.
Read how to add automations to your chat - Data sources
Define where the chat will take the data from
Read how to add data sources to your chat - File sources
Upload files that the chat can refer to and use in the conversation.
Read how to add reference files to your chat - AI Tools
Select AI agents and tools that will be used by the chat
When done click on the debug
In builder header > click Debug icon > Debug draft version
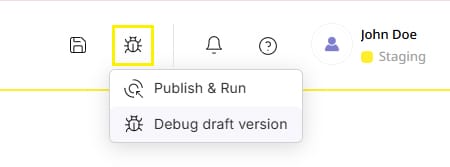
If the debug is successful go ahead and publish the chat
In builder header > click Debug icon > publish & run
1. Chat Settings
Define your chat’s identity:
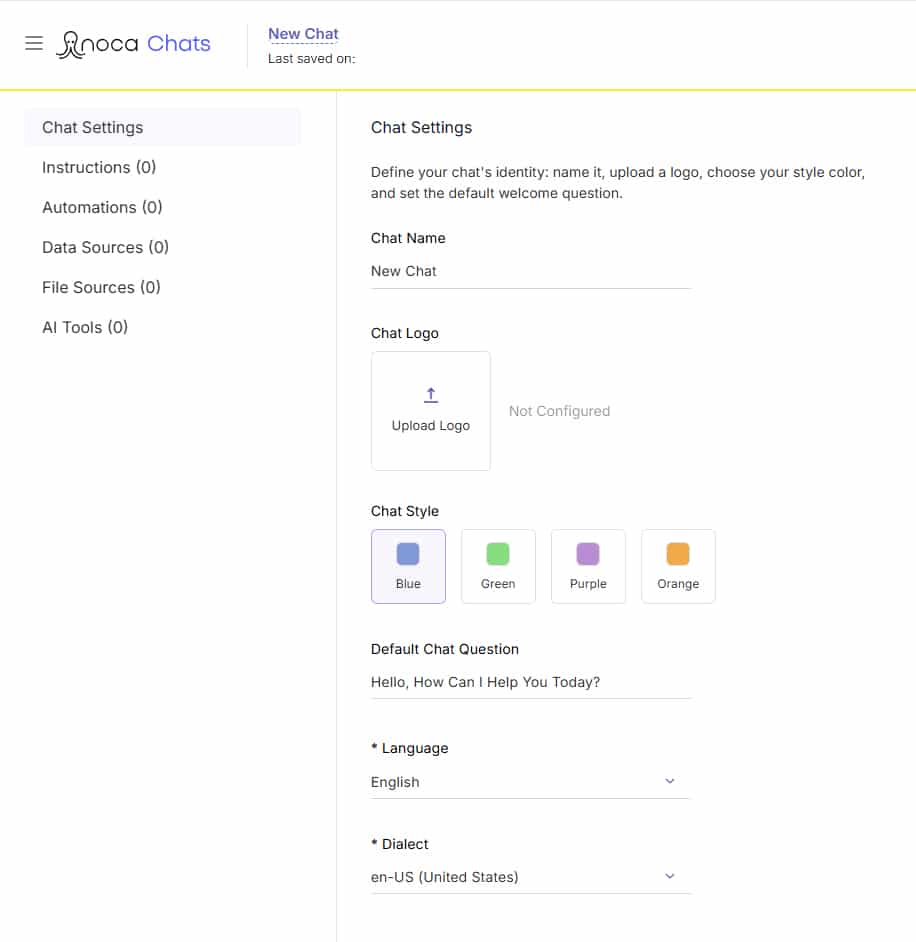
- Chat name
- Chat logo (upload)
- Chat style (choose a color theme)
- Default Chat Question
- Language
- Dialect (If there are any)
2. Instructions
Upload documents that contain clear instructions on how the conversation should flow in the chat. For example:
To add Instructions
Click the + icon and upload your file
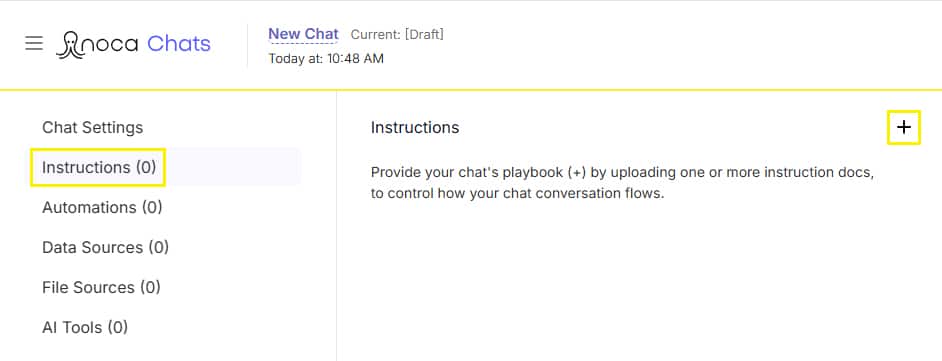
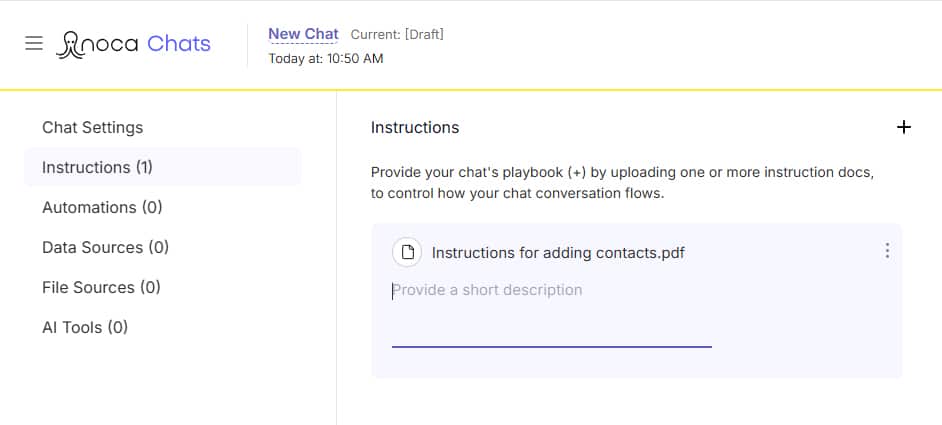
The file will then appear in the list below with an icon and name
Add a short description to help you identify it.
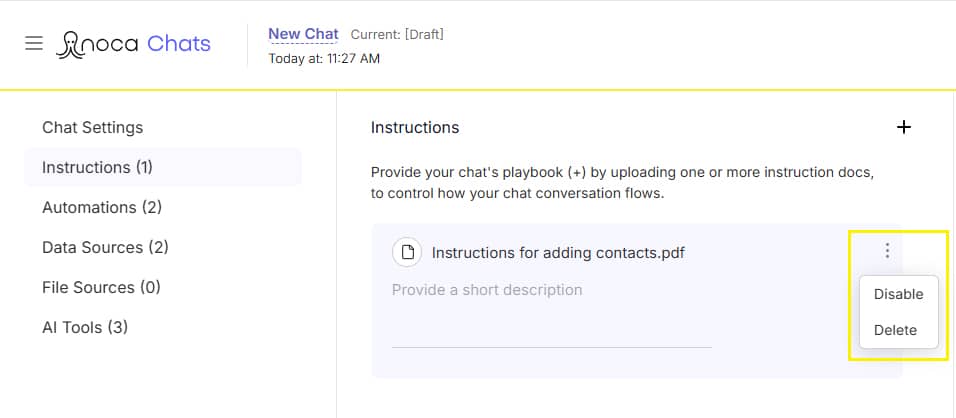
A kebab menu on the right will to allow the actions: disable and delete.
3. Automations
What is an Automation?
An automation refers to a sequence of steps—APIs calls, logic, and actions—that your chat can invoke on demand. The automation is basically an autonomous Flow you build and publish in the Flow Builder.
Add Automations to your Chat:
Click the + icon
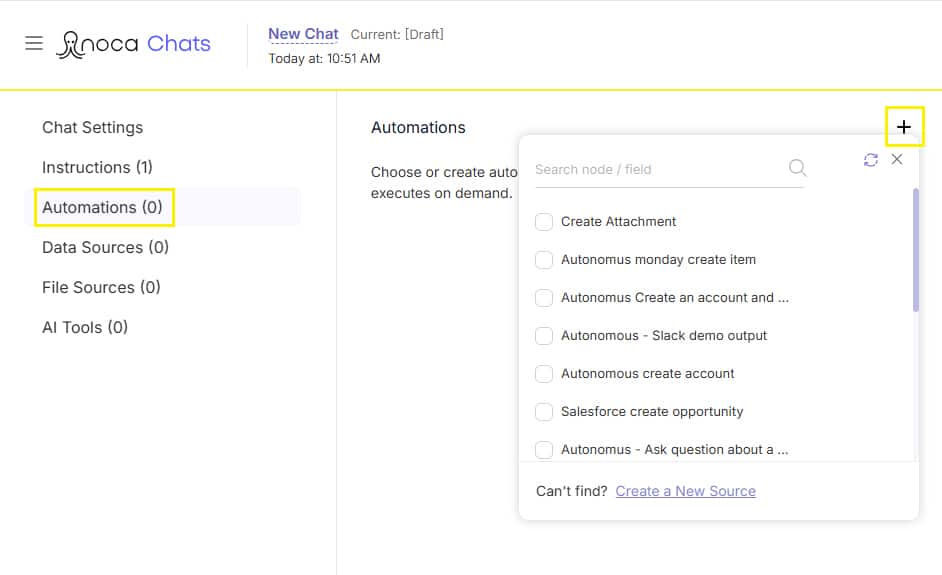
Select from your published Flows (use the checkboxes) or click Create new Tool to jump back to the Flow Builder
Once added, each Tool appears in a list below with its service logo, Flow name, and kebab menu for actions
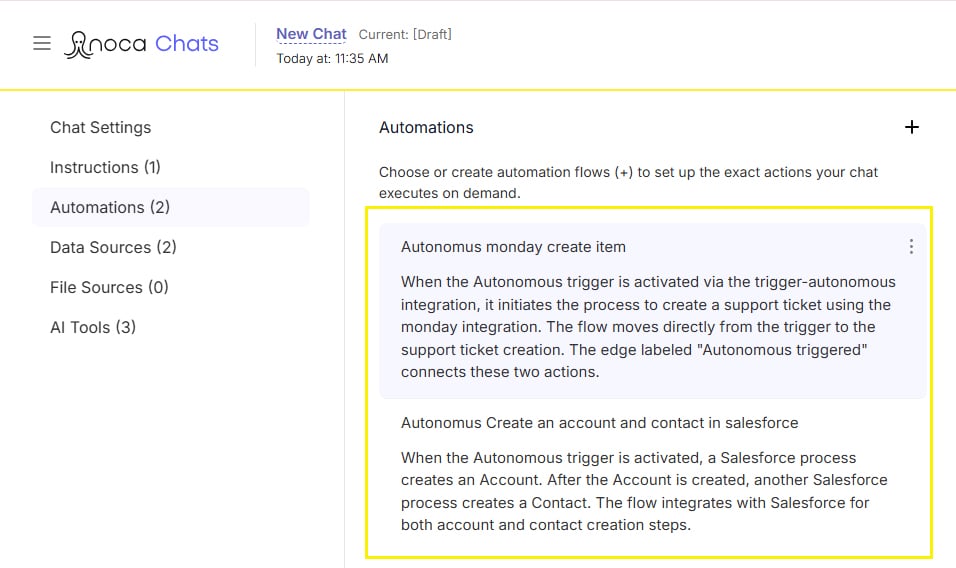
To create a new Automation (created in the flow builder)
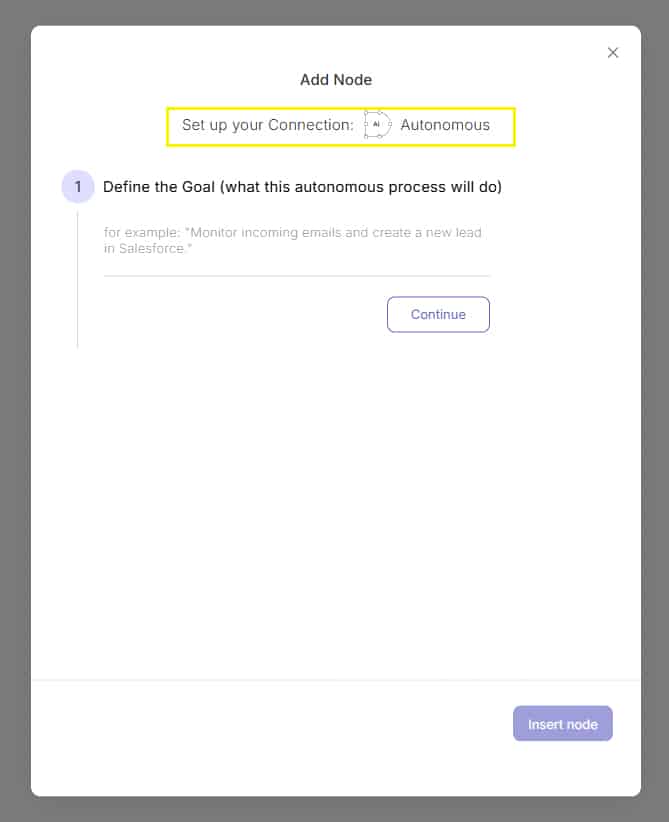
Click on “create a new automation” at the bottom of the automations list
This will automatically take you to the flow builder and open the “Add Node” modal for you – to create a new autonomous flow.
* Please note that you can also go directly to the flow builder and create an autonomous flow yourself.
Read how to create the autonomous flow
Name and Save the flow
Once the flow is done Click on the Noca name in the flow builder header and change it. then Save the flow.

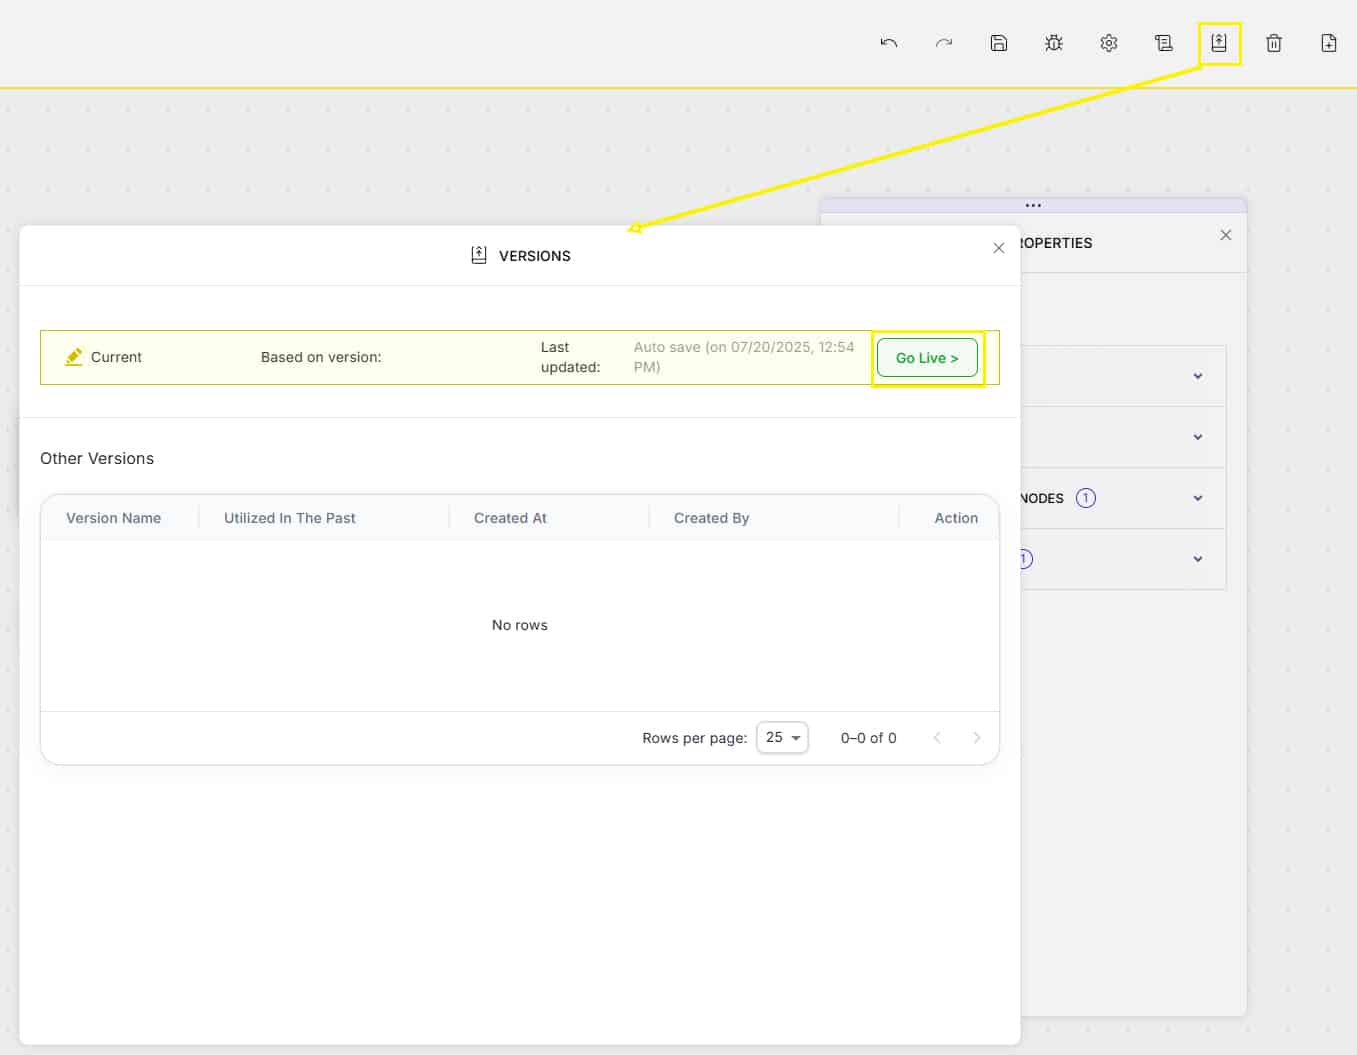
Publish the flow to make it live
4. Data Sources
What is a Data Source?
A Data Source is a single-node Flow whose sole purpose is to fetch data from an external system (database, API, etc.). By defining your Data Source as a Flow, you ensure consistency, reusability, and security.
Adding Data Sources to your Chat:
Click the + icon
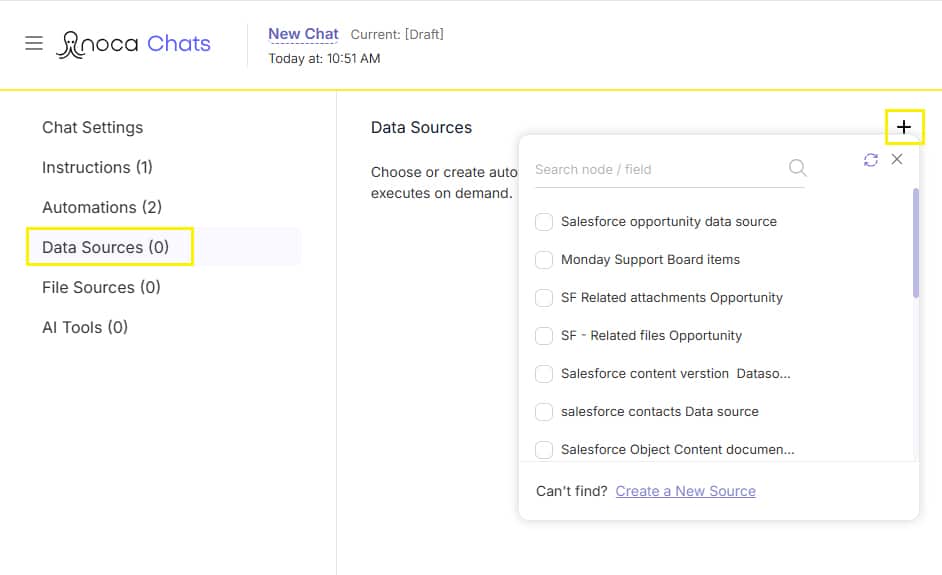
Select from your existing Data Sources or click Create new Data Source
Select by turning on the relevant checkboxes
Each added source will then appear in a list below with its service logo, Flow name, and kebab menu for actions
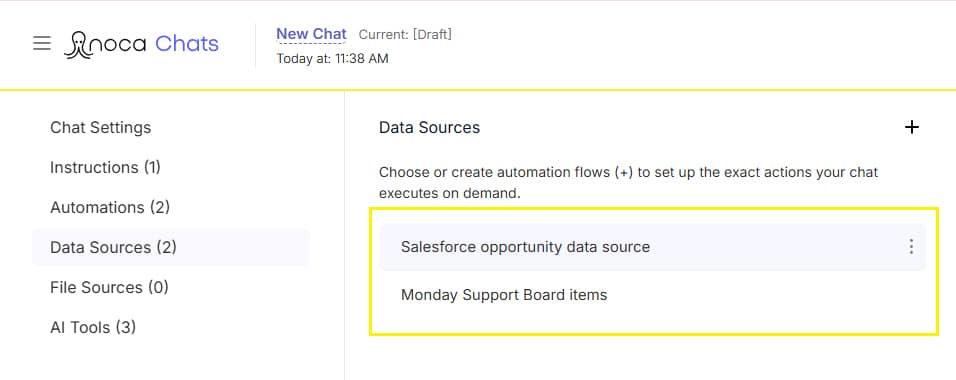
creating a new Data Source:
At the bottom of the Data source list – Click on the “Create new data source” link
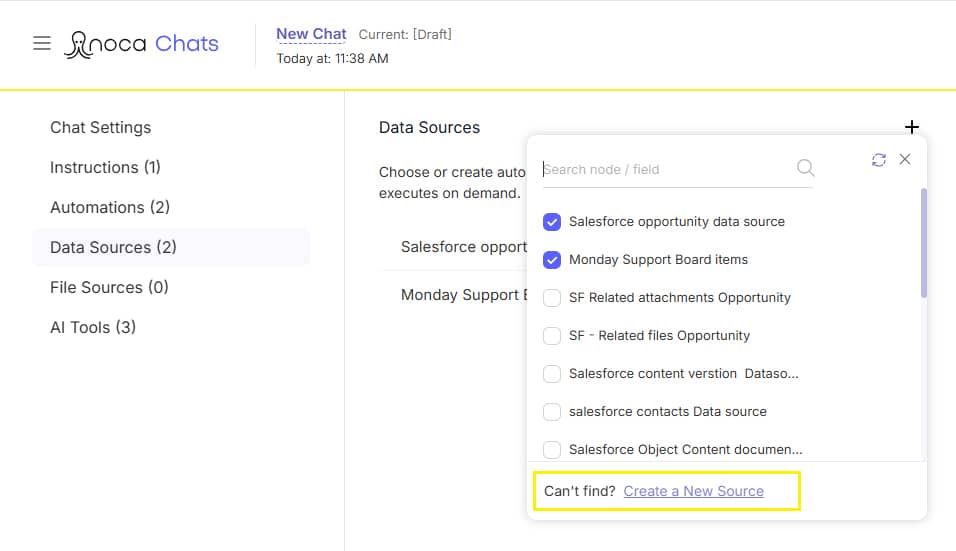
This will open the “Add Node” modal with the “Data Source” tab open
Select one of the available services: Salesforce, Netsuite, Priority, Monday.
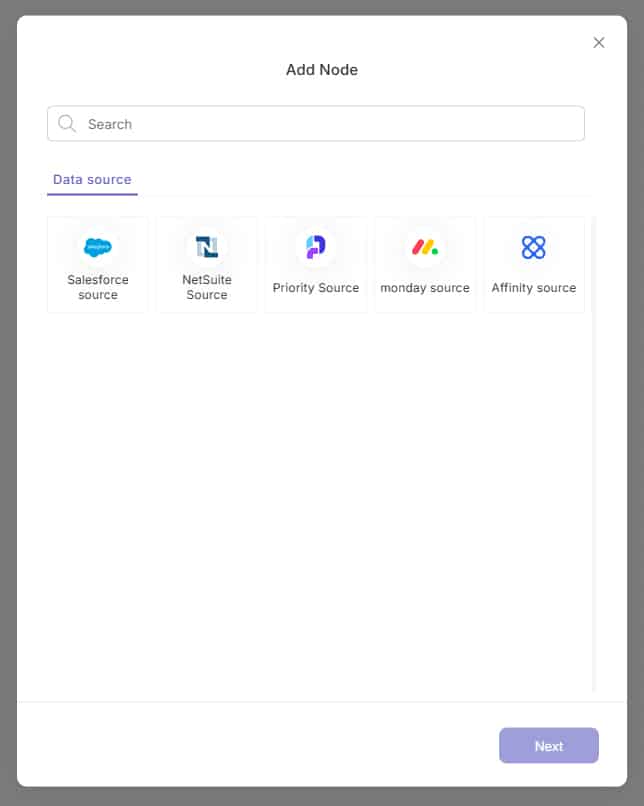
and then press on “Next”.
Set the required configurations
Select the connection and the other required settings (based on your chosen service).
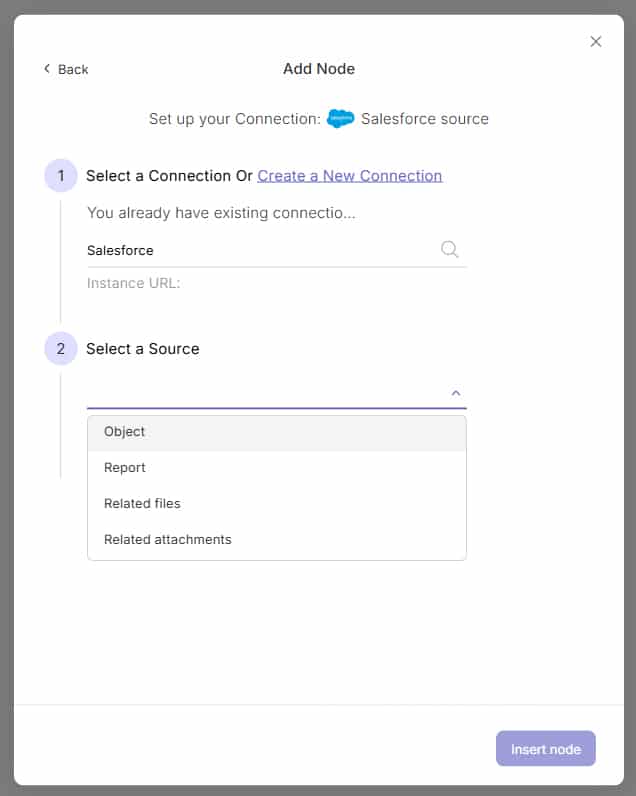
Click on “Insert node”
Name and Save the flow
Do not worry about publishing the Data source flow – this will be done automatically when you publish the Chat.
4. File Sources
Upload documents, templates, or other files for on-demand reference (e.g., an invoice template you can fill out via chat).
To add File Sources:
Click the + icon and upload your file(s)
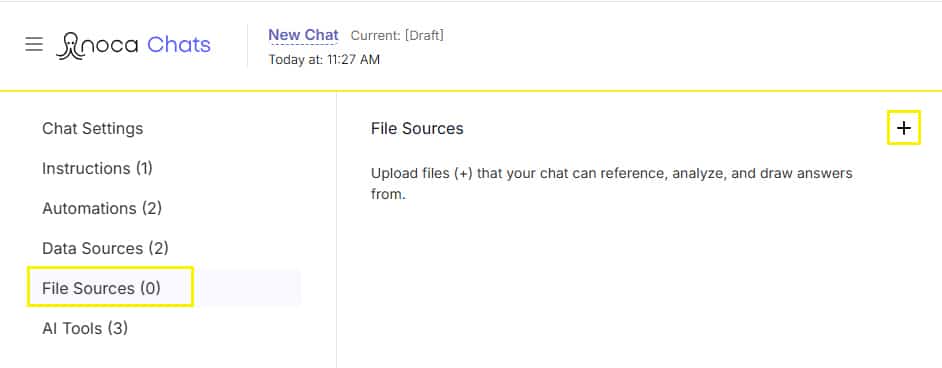
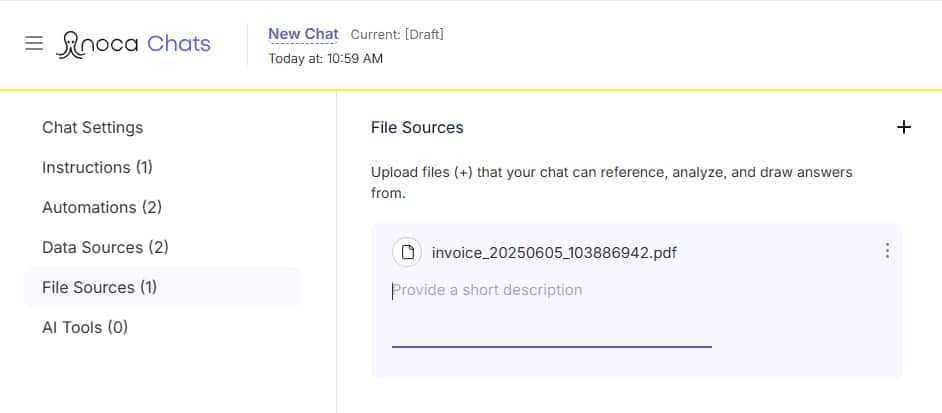
Each file will then appear in the list below with its icon, name, description, and kebab menu
5. AI Tools
Select AI agents and tools that will be used by the chat when answering the users.
To add AI agents and tools to the process:
In the Chat Builder’s left menu, click AI Tools
Click the + icon
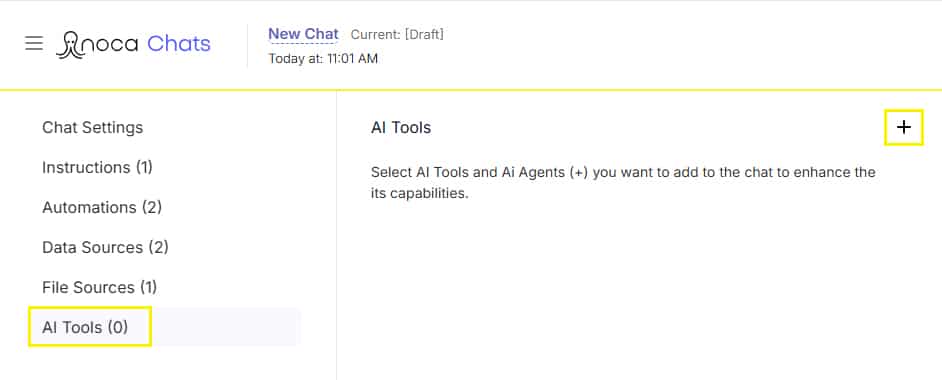
Select from the AI agents and tools in the list
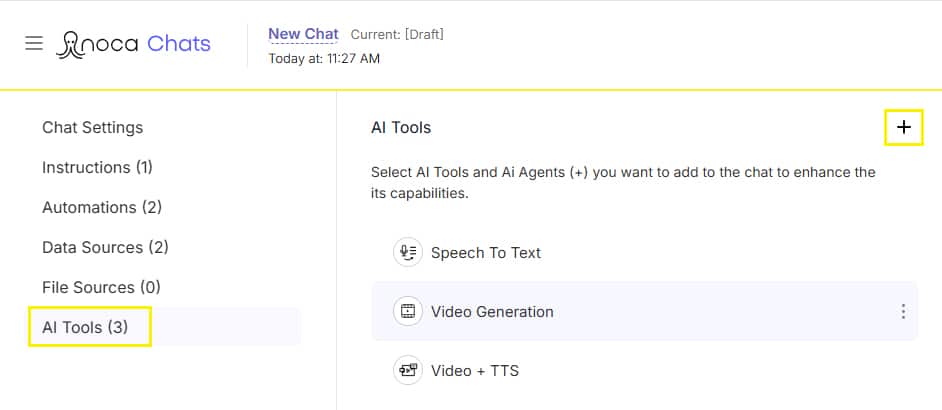
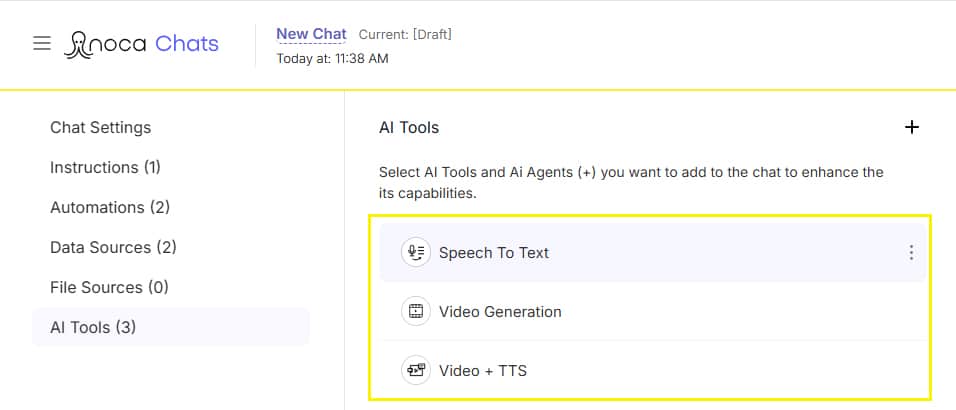
Each tool will then appear in the list below with its icon, name, and kebab menu
(offering delete and disable options)
By following these steps, you can create powerful, data-driven conversational experiences that feel natural and responsive. Using prompt to chat bot workflows, your chat can fetch data, perform actions, and guide users seamlessly—turning complex processes into simple, automated interactions.