

Setting Up an SMTP Connection with Gmail
SMTP integration lets your workflows send email notifications seamlessly. This guide walks you through establishing an SMTP connection with Gmail.
Keep in mind you can set up other SMTP connections with other SMTP providers.
Before You Begin (Google Account Configuration)
1
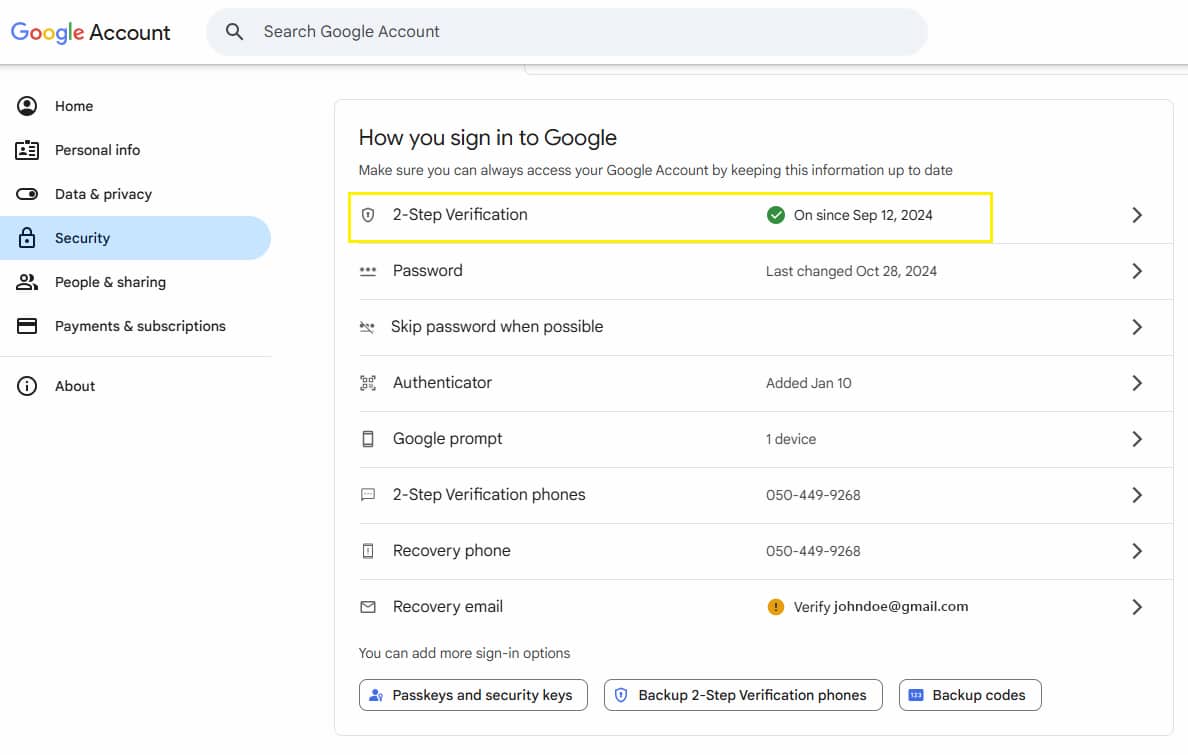
Enable Two-Factor Authentication
- Sign in to your Google Account and navigate to Security.
- Ensure the 2FA (2-Step Verification) is turned on.

2
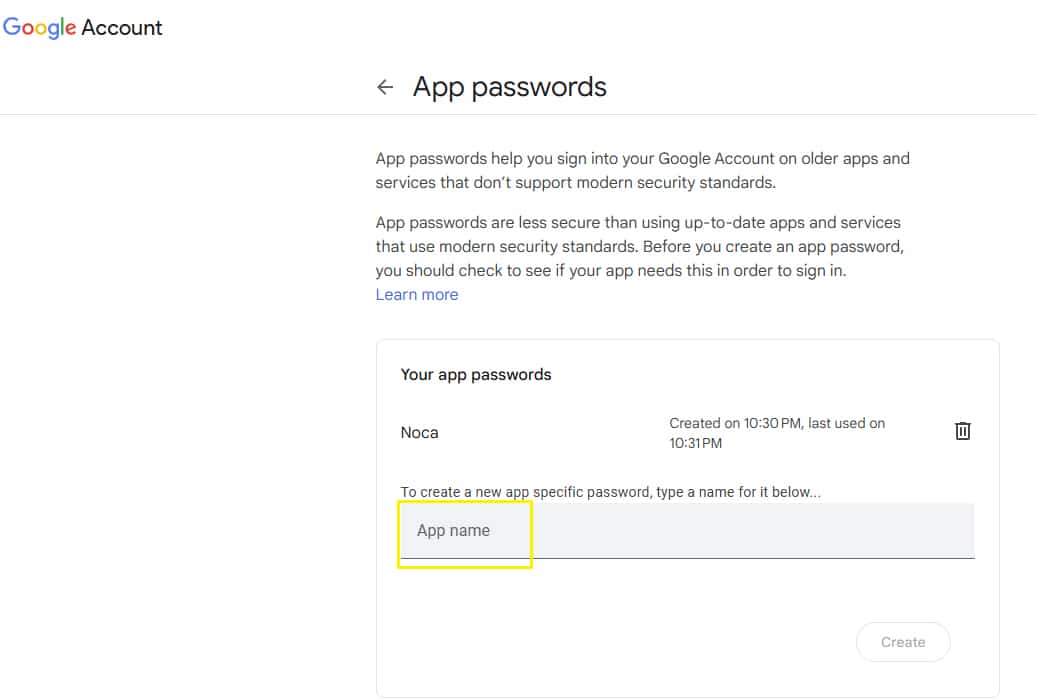
Generate an App Password
- Visit myaccount.google.com/apppasswords.
- Create a new app and name it Noca.

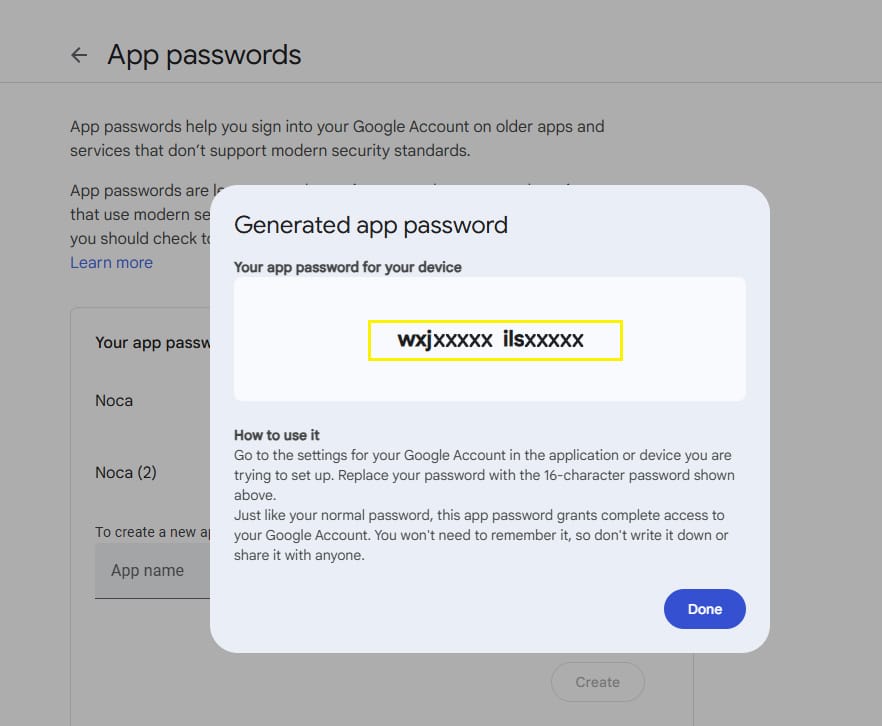
- A modal will then open with a password.
- Copy the generated password—you’ll need it when configuring your connection in Noca.

Adding Your SMTP Connection (In Noca)
1
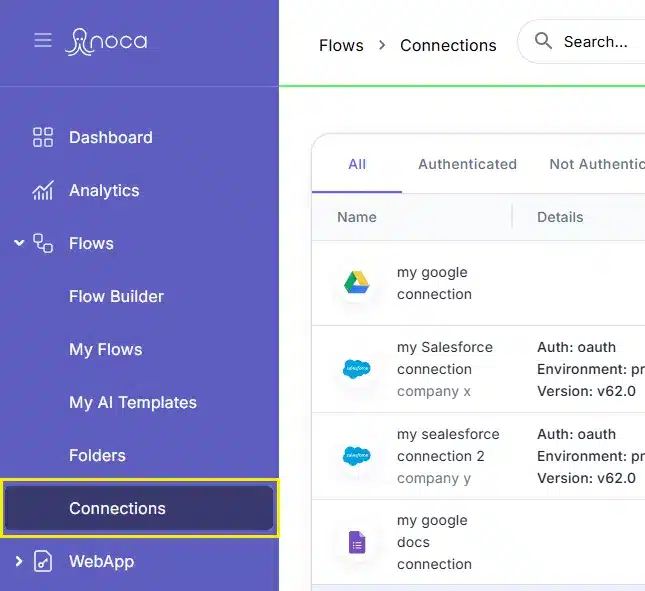
Open Connections
- In the left-hand drawer menu, go to Flows > Connections.
- Click Add New at the top of the page.

2
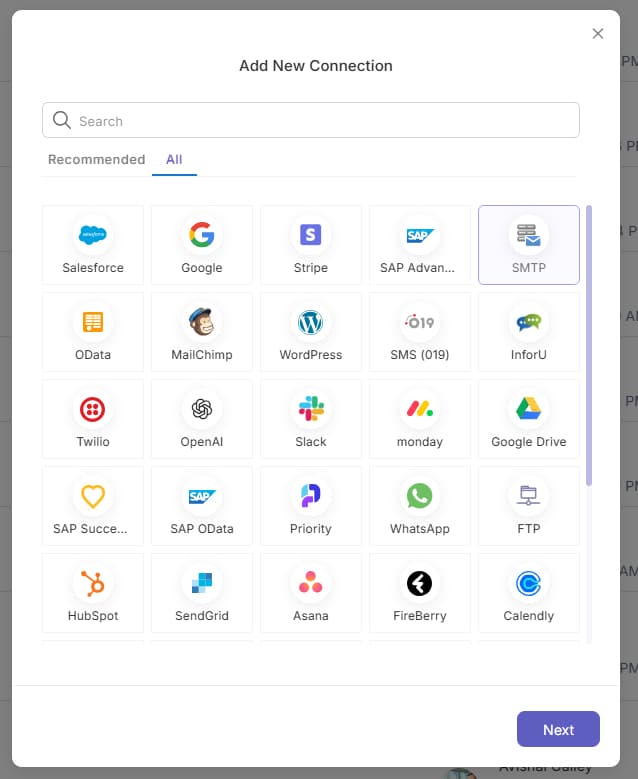
Choose the SMTP App
- In the service list (under Recommended or All), select SMTP.

- If you already have SMTP connections, you can view or edit them; otherwise, click Create New.
3
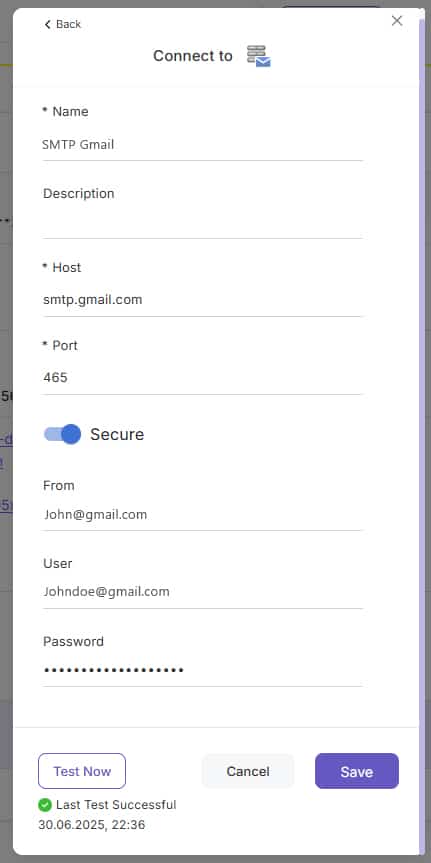
Enter Connection Details
- Connection Name: Give it a clear, descriptive name (e.g., “Gmail SMTP”).
- Description (optional): Add internal notes if needed.
- Host: smtp.gmail.com
- Port: 465
- Secure: Turn the Toggle On
- From: The email address you want displayed as the sender
- User: Enter your full Gmail address
- Password: Paste the app password you generated earlier

4
Test and Save
- Click Test Now to verify the configuration.
- If the test succeeds, click Save to finalize your SMTP connection.
- Cancel will exit without saving.
Wizard Header Controls
- Back: Return to the previous step
- Help: Open the relevant Help Center article
- Close (X): Exit the setup wizard at any time
With these steps complete, your Gmail SMTP connection is ready. You can now send email notifications directly from your Noca flows—and follow similar steps to connect any other SMTP service.
Back to top